Your Roku Install Complete Streaming Device Setup Guide

Table of Contents
- What’s Inside Your Roku Box
- Choosing the Right HDMI Port
- Connecting Power and Cables
- Setting Up Your Roku Remote
- Connecting Your Roku to WiFi
- Creating and Linking Your Roku Account
- Finding and Installing Essential Streaming Apps
- Mastering Your Roku’s Advanced Features
What’s Inside Your Roku Box
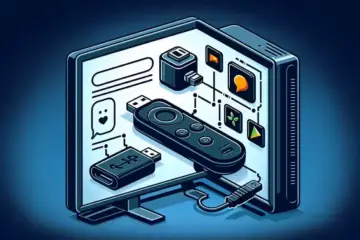
Before you begin the Roku install process, it’s helpful to know exactly what you’re working with. When you open the box, you should find the Roku streaming device itself, a simple remote control (often with batteries included), and a power adapter. Additionally, you’ll find a high-speed HDMI cable to connect the device to your TV. Some models may also include an Ethernet cable for a wired internet connection, offering a more stable alternative to Wi-Fi. Finally, don’t overlook the quick-start guide, which provides essential setup instructions.
Choosing the Right HDMI Port
The next step in your Roku setup is connecting it to your television. Virtually all modern TVs have multiple HDMI ports on the back or side. For the best experience, it’s recommended to use an HDMI port that supports the latest standards. Many newer TVs label one port as “HDMI ARC” (Audio Return Channel) or “HDMI eARC.” While these are excellent for soundbars and home theater systems, any standard HDMI port will work perfectly for your Roku. Just make a mental note of which port number you use (e.g., HDMI 1, HDMI 2), as you will need to select the corresponding input on your TV later.
Connecting Power and Cables
With the right HDMI port identified, you can now connect all the cables. First, plug one end of the HDMI cable into your Roku device and the other end into your chosen TV HDMI port. Next, connect the power adapter to your Roku and plug it into a wall outlet. It is crucial to use the official power adapter that came with your device, as third-party alternatives may not provide consistent power and can cause performance issues [Source: Roku Support]. Once everything is connected, turn on your TV and select the correct HDMI input source using your TV remote.
Setting Up Your Roku Remote
The final hardware step is getting your remote ready. If batteries aren’t pre-installed, insert them into the battery compartment. Your Roku remote may be one of two types: an IR (Infrared) remote or a “point-anywhere” remote. An IR remote requires a direct line of sight to the Roku player, while a point-anywhere remote uses Wi-Fi Direct and does not. Furthermore, some advanced remotes offer features like TV power and volume controls, which you can program to operate your television, eliminating the need for multiple remotes. This seamless integration is a key part of the user-friendly Roku experience.
Once your hardware is fully connected, your Roku device will power on and guide you through the on-screen setup, including connecting to your Wi-Fi network and activating the device. This straightforward process ensures you’ll be streaming your favorite shows from services like Netflix and Hulu in no time. For those exploring a wider range of content, you might also be interested in learning about the best IPTV subscription services to expand your entertainment options.
Connecting Your Roku to WiFi
Connecting your Roku device to your home WiFi network is a straightforward process that unlocks access to thousands of streaming channels. First, ensure your Roku device is powered on and connected to your TV. Navigate to the Settings menu from the home screen, then select “Network.” Choose “Set up connection” and select “Wireless.” Your Roku will scan for available networks.
From the list, select your home WiFi network. You will be prompted to enter your network password using the on-screen keyboard. For security, ensure you enter the credentials accurately. Once entered, your Roku will attempt to connect. A successful connection will be confirmed on-screen, and your device is now ready for streaming.
Securely Entering Your WiFi Credentials
When entering your WiFi password, it’s crucial to prioritize security. Make sure you are connecting to the correct network name (SSID) to avoid joining a malicious hotspot. Roku devices use WPA2 or WPA3 security protocols, which help protect your data during transmission. Always double-check that you are in a private setting when inputting sensitive information to prevent shoulder surfing.
If you make a mistake while typing, you can easily backspace and correct it. After submission, your Roku saves these credentials for future use, so you won’t need to re-enter them unless you change your WiFi password or network settings.
Troubleshooting Common Connection Issues
Sometimes, connection attempts fail. If your Roku cannot connect to WiFi, first verify that your WiFi router is powered on and broadcasting. Check if other devices can connect to the same network. If they can’t, the issue likely lies with your router or internet service provider.
For Roku-specific issues, try these steps:
- Restart your Roku device and router.
- Move your Roku closer to the router to improve signal strength.
- Ensure you are entering the correct password—they are case-sensitive.
- Check for any router settings that might block new devices, like MAC address filtering.
If problems persist, a network reset on the Roku (Settings > System > Advanced system settings > Network connection reset) can often resolve persistent glitches. For more complex network setups, our guide on choosing the best IPTV subscription also covers network considerations for optimal streaming performance.
Creating and Linking Your Roku Account
Before you can start streaming, you need to create and link a Roku account. This account serves as your central hub for managing devices, channels, and preferences. First, visit the Roku account creation page on a computer or smartphone. You’ll need to provide basic information like your name, email address, and a secure password.
After creating your account, you must link your Roku device. Turn on your Roku device and follow the on-screen setup prompts. Your TV will display a unique activation code. Meanwhile, using a separate device, go to Roku.com/link and enter this code. This crucial step pairs your physical device with your online account, enabling full functionality.
Entering the Activation Code
The activation process is straightforward but essential. Your Roku device displays a code that typically looks like “XDC3F2.” If the code doesn’t appear automatically, navigate to “Settings” then “System” and finally “About” on your Roku home screen. Ensure you enter the code exactly as shown, including any capital letters.
Sometimes, users encounter issues with activation codes expiring. If your code isn’t working, you can usually request a new one by restarting your Roku device. Simply unplug the power cord for 10 seconds, then plug it back in. A fresh code should appear on your screen shortly after reboot.
Setting Up Payment Methods for Premium Content
While many streaming apps are free, premium channels and rentals require a payment method. Roku accepts major credit cards, debit cards, and PayPal. To add a payment option, visit your account page at my.roku.com/account and select “Add Payment Method.”
Roku only charges your payment method when you make a purchase or subscribe to a paid channel. Importantly, you can remove your payment information after setup if you prefer to use channel-specific billing. For those interested in premium live TV services, our guide on the best IPTV subscriptions explores additional entertainment options beyond standard Roku channels.
Finding and Installing Essential Streaming Apps
After completing your Roku setup, the first step is to browse the Roku Channel Store to install your favorite streaming services. You can access the store directly from your Roku home screen. Simply navigate to “Streaming Channels” to open the main marketplace.
The store is neatly organized into categories like “Movies & TV,” “Sports,” and “News,” making it easy to discover new content. For most users, installing foundational apps like Netflix, Hulu, and YouTube is essential. These platforms form the core of most streaming libraries.
How to Add Channels to Your Roku
Adding a channel is a straightforward process. First, find the app you want in the Channel Store. Then, select “Add Channel.” The app will automatically download and install to your home screen. Many popular services are free to add, though most require a separate subscription to access their full content libraries.
Some apps may prompt you to activate your device by visiting a website like roku.com/activate and entering a code displayed on your TV screen. This links your streaming device with your account.
Organizing Your Channels for Easy Access
As you add more apps, your home screen can become cluttered. Fortunately, Roku allows you to reorganize your channels for a more personalized experience. Press the asterisk (*) button on your Roku remote while highlighting a channel to bring up the options menu.
From here, you can choose “Move channel” to change its position. A good strategy is to place your most-used apps at the top of the list for instant access. You can also remove channels you no longer watch by selecting “Remove channel” from the same menu.
Mastering Your Roku’s Advanced Features
Once you’ve completed the basic Roku installation, you’ll want to explore the powerful features that transform your streaming experience. These advanced capabilities help you get the most from your device while addressing common setup challenges.
Mobile App Setup and Control
The free Roku mobile app serves as a powerful remote control alternative and setup assistant. Available for both iOS and Android devices, this app simplifies the initial configuration process by allowing you to enter Wi-Fi passwords and account information directly from your phone’s keyboard. Additionally, the app includes private listening functionality, enabling you to listen through headphones connected to your mobile device without disturbing others [Source: Roku Support].
For those who frequently misplace their physical remote, the mobile app provides a convenient backup control method. The app also offers voice search capabilities and quick access to your favorite channels, making navigation significantly more efficient than using the standard remote alone.
Screen Mirroring Capabilities
Roku’s screen mirroring feature allows you to display content directly from compatible smartphones, tablets, and computers onto your television screen. This functionality works with both Windows and Android devices through Miracast technology, while Apple devices can mirror using AirPlay [Source: Roku Support].
To enable screen mirroring, navigate to Settings > System > Screen mirroring on your Roku device and select “Always allow.” Meanwhile, on your mobile device, access the cast or screen mirroring option in your quick settings menu. This feature proves particularly useful for sharing photos, presentations, or streaming content from apps not available on the Roku platform.
Voice Control and Search
Modern Roku devices equipped with voice-enabled remotes allow you to search for content, launch channels, and control playback using simple voice commands. Simply press and hold the voice button on your remote and speak naturally to find movies by title, actor, or genre. Voice search scans across multiple streaming platforms simultaneously, saving you the time of searching each app individually.
Beyond content discovery, voice commands can control basic functions like volume adjustment, playback pausing, and even switching inputs on compatible televisions. This hands-free operation becomes especially valuable when you need quick access while multitasking.
Troubleshooting Common Setup Issues
Even after successful installation, you might encounter occasional technical challenges. Connection problems rank among the most frequent issues Roku users face. If your device struggles to connect to Wi-Fi, try power cycling both your router and Roku device, then attempt reconnection. For persistent connectivity issues, consider moving your router closer to the Roku or using a WiFi extender.
Software updates represent another common concern. Roku devices typically update automatically, but you can manually check for updates by navigating to Settings > System > System update. Ensuring your device runs the latest software resolves many performance issues and adds new features [Source: Roku Support].
Remote connectivity problems often stem from simple battery issues or infrared obstructions. First, replace the batteries in your remote. If problems persist, ensure nothing blocks the path between your remote and Roku device. For enhanced remotes that use WiFi Direct, try re-pairing the remote through Settings > Remotes & devices > Remotes.
Sources
- Hulu – Add Hulu to Roku
- Netflix – Netflix Help Center
- Roku – Add Payment Method
- Roku – Device Activation
- Roku – Sign Up
- Roku Support – Power and Connectivity
- Roku Support – Mobile App Features
- Roku Support – System Updates
- Roku Support – Screen Mirroring
- Streaming Devices Guide – Best IPTV Subscription Services
- Streaming Devices Guide – IPTV Free Trial Guide
- Roku – Official Website