Your Complete Guide To Roku Installation And Setup
Identifying Your Roku Device Model
Before beginning your Roku installation, the first step is identifying your specific device model. This information determines which setup process you’ll follow and what features are available. You can find your model number in several locations: on the original packaging, printed directly on the device itself, or within the Settings menu of an already-set-up device.
Roku devices fall into several categories including streaming sticks, set-top boxes, and smart TVs with Roku built-in. Each model offers different capabilities, from 4K Ultra HD streaming to voice control features. Knowing your exact model ensures you follow the correct setup procedure and understand what performance to expect.
Essential Roku Components and Accessories
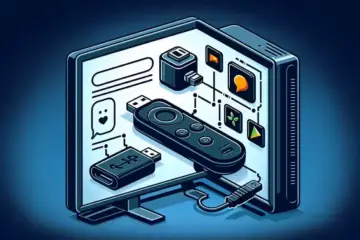
Your Roku package should contain several key components necessary for installation. The main device itself is the streaming player, which connects to your television. You’ll also need the included power adapter and cable, which provides the necessary power supply. Most Roku models include a high-speed HDMI cable for connecting to your TV, though some older models may use composite cables.
The remote control is another essential component. Newer Roku models feature voice remotes with dedicated shortcut buttons, while basic models include simpler infrared remotes. Some premium models even offer “point-anywhere” remotes that don’t require direct line-of-sight to your device. Additionally, check for any included batteries for your remote and the warranty documentation.
Understanding Roku Device Capabilities
Different Roku models support varying levels of video quality and features. Basic models like the Roku Express support HD streaming (720p/1080p), while premium devices like the Roku Ultra support 4K, HDR10, and Dolby Vision. If you have a 4K television, ensure your Roku model supports this resolution to take full advantage of your TV’s capabilities.
Audio capabilities also vary between models. Some support basic stereo output, while others feature advanced audio formats like Dolby Atmos. Gaming features, private listening options, and Ethernet connectivity for more stable streaming are additional considerations that depend on your specific model. Understanding these capabilities helps you optimize your setup for the best streaming experience.
Checking Network Requirements
Before installation, verify that your home network meets Roku’s requirements. All Roku devices need a broadband internet connection with minimum speeds of 3.0 Mbps for SD content and at least 8.0 Mbps for HD content. For 4K streaming, you’ll need at least 25 Mbps for optimal performance. Both wireless and wired connections are supported, though higher-end models typically offer Ethernet ports for more reliable connectivity.
Your Roku device must connect to a 2.4 GHz or 5 GHz wireless network, with dual-band models automatically selecting the best available frequency. Ensure your Wi-Fi password is readily available during setup, as you’ll need it to connect your device to the internet. For the best performance, position your Roku device within good range of your wireless router or use an Ethernet connection if available.
Preparing Your Television Setup
Proper television preparation is crucial for successful Roku installation. Identify available HDMI ports on your TV – most modern televisions have multiple HDMI inputs. Note which HDMI port you use for your Roku, as you’ll need to select the corresponding input on your TV. Ensure you have adequate space near your television for the Roku device and proper ventilation to prevent overheating.
If you’re using a soundbar or home theater system, plan how your Roku will integrate with your audio setup. Some configurations may require an HDMI ARC (Audio Return Channel) port for optimal audio performance. Additionally, consider cable management to keep your entertainment area organized and ensure all components receive adequate power from available outlets.
Once you’ve identified all components and understood your device’s capabilities, you’re ready to proceed with the physical setup. For additional guidance on streaming services that work with your Roku, explore our complete IPTV subscription guide to enhance your streaming experience.
Connecting Your Roku Device to Your TV and Audio System
Setting up your Roku streaming device correctly ensures optimal performance and an enjoyable viewing experience. This step-by-step guide covers the physical connections to your TV, power source, and audio systems.
Step 1: Unbox and Identify Components
First, carefully unbox your Roku device and ensure you have all the necessary components. Typically, this includes the Roku player itself, a remote control (with batteries), a power adapter, and an HDMI cable. Some models, like the Roku Streaming Stick, plug directly into an HDMI port, while others, like the Roku Ultra, connect via a cable.
Step 2: Connect the Roku to Your TV
Locate an available HDMI port on your television. For the best video quality, use the HDMI cable provided with your device or a high-speed HDMI cable. Plug one end firmly into your Roku device and the other end into your TV’s HDMI port. Remember which HDMI input number you used (e.g., HDMI 1), as you will need to select this source later.
Step 3: Connect to Power
Next, plug the power adapter into your Roku device and connect the other end to a wall outlet. Most Roku players require external power, even if your TV’s USB port seems convenient. Using the official power adapter prevents potential performance issues. The device should power on automatically, indicated by a light on the front.
Step 4: Configure Audio Connections (If Applicable)
For standard audio, the HDMI connection will transmit sound to your TV. However, if you have a separate soundbar, home theater system, or audio receiver, you can enhance your audio experience. Connect your Roku player to these systems using an additional audio cable, like an optical cable, if your model and audio system support it. Alternatively, you can connect the audio system directly to your TV’s audio output.
Step 5: Select the Correct TV Input
Using your TV remote, change the input or source to the HDMI port where you connected the Roku. For instance, if you used HDMI 2, select that input. Your TV screen should then display the Roku setup interface, guiding you through the remaining software configuration. If the screen remains blank, double-check all cable connections and ensure the Roku device is powered on.
Troubleshooting Common Connection Issues
Sometimes, you might encounter a “no signal” message or a blank screen. First, verify that all cables are securely connected at both ends. Try using a different HDMI port on your TV or a different HDMI cable if available. Ensure your TV is set to the correct input source. If problems persist, consult the official Roku support page for specific troubleshooting tips. For more general streaming advice, explore our guide on the best IPTV subscriptions.
Setting Up Your Roku: First Boot and Network Connection
When you first power on your Roku device, you’ll be guided through a straightforward setup process. Begin by selecting your preferred language and country settings using the included remote. The device will then automatically search for available networks, displaying a list of Wi-Fi options in your area.
Choose your home network from this list and enter your Wi-Fi password carefully using the on-screen keyboard. For optimal performance, ensure you’re connecting to the correct network band – many modern routers broadcast both 2.4GHz and 5GHz networks. The 5GHz band typically offers faster speeds but shorter range, while 2.4GHz provides broader coverage at slightly slower speeds.
Troubleshooting Common Connection Problems
If your Roku fails to connect to Wi-Fi, start by verifying your password is correct. Many connection issues stem from simple typos. Double-check capitalization and special characters, as passwords are case-sensitive. If the problem persists, restart both your router and Roku device by unplugging them for 30 seconds before reconnecting.
Signal strength can significantly impact connectivity. Position your Roku closer to your router or consider using a Wi-Fi extender if the signal appears weak. For more reliable performance, you might explore using an Ethernet adapter for wired connection, particularly if you plan to stream high-quality content regularly.
Advanced Network Solutions
Sometimes, network configuration issues require deeper investigation. Ensure your router’s firmware is updated to the latest version, as outdated software can cause compatibility problems. Check that your router isn’t blocking the Roku’s connection – some security settings may inadvertently prevent new devices from joining the network.
If you continue experiencing difficulties, try connecting your Roku to a mobile hotspot temporarily. This helps determine whether the issue lies with your home network or the device itself. For persistent problems, performing a factory reset (holding the reset button for 20 seconds) often resolves software glitches, though this will erase all settings.
Once successfully connected, your Roku will download any available updates, which is essential for accessing the latest features and security improvements. This initial setup establishes the foundation for your streaming experience, so taking time to ensure a stable connection pays dividends in reliable performance moving forward. For additional streaming guidance, explore our complete streaming device resource center.
Creating and Activating Your Roku Account
Creating Your Roku Account
To begin using your Roku device, you must first create a Roku account. This account is essential as it links your device to the Roku platform, allowing you to add channels, manage subscriptions, and personalize your streaming experience. Visit the official Roku website on a computer or smartphone and select “Sign up” to create a new account. You will need to provide a valid email address, create a password, and agree to the terms of service. Importantly, creating a basic Roku account is free and does not require immediate payment information unless you plan to make purchases [Source: Roku Support]. This account serves as your central hub for all device management and channel additions.
Activating Your Roku Device
Once your account is created, the next step is to activate your Roku device. Connect your Roku player or TV to your television and power it on. Follow the on-screen instructions to select your language and connect to your Wi-Fi network. Your device will then display an activation code. Using a separate computer or smartphone, go to roku.com/link, enter the code provided on your screen, and sign in with your new Roku account credentials. This links your device to your account. Your Roku will automatically update and restart, finalizing the activation process. This crucial step syncs your hardware with the Roku ecosystem, enabling full functionality.
Setting Up Payment Methods
Although not mandatory for a free account, adding a payment method simplifies purchasing premium channels, movies, or subscriptions later. In your account settings on the Roku website, navigate to the “Payment methods” section. Here, you can add a credit card, debit card, or PayPal account. Roku uses a secure, encrypted system to store your payment details. Alternatively, you can use Roku Pay, which allows you to make purchases across supported channels with a single, stored payment method [Source: Roku Support]. This streamlines transactions and is particularly useful if you plan to explore various streaming services, including different IPTV subscription options.
Configuring Your Privacy Preferences
Finally, take a moment to configure your privacy settings to control how your data is used. In your Roku account under “Privacy Settings,” you can manage preferences for personalized advertising and data collection. For instance, you can disable “ACR” (Automatic Content Recognition), which tracks what you watch to suggest content and serve targeted ads. Reviewing these settings ensures your viewing habits remain as private as you prefer. Additionally, you can set a PIN for purchases to prevent unauthorized transactions, adding an extra layer of security for your account and payment information [Source: Roku Support].