Roku Install Complete Streaming Device Setup Guide
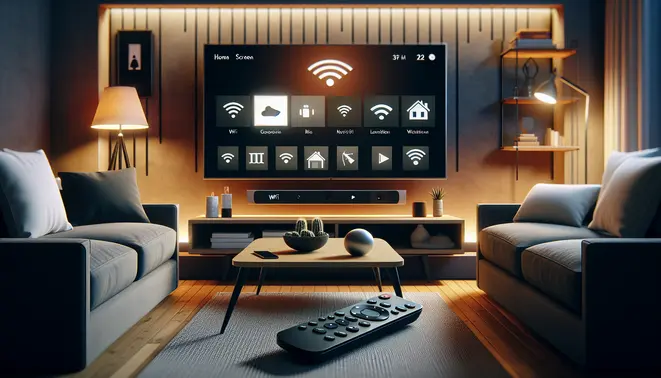
Table of Contents
- What’s Inside Your Roku Box
- How to Identify Your Specific Roku Model
- Pre-Installation Preparation Steps
- Connecting Your Roku Device to Power and TV
- Completing the Initial Setup Process
- Creating and Activating Your Roku Account
- Pairing and Understanding Your Roku Remote
- How to Add and Manage Channels
- Advanced Settings and Troubleshooting
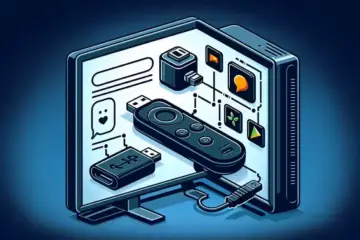
What’s Inside Your Roku Box
Opening a new Roku device reveals several essential components designed to get you streaming quickly. Every standard package includes the Roku streaming player itself, which serves as the heart of your entertainment setup. Additionally, you’ll find a simple remote control, typically requiring either batteries or featuring voice control capabilities depending on your model[1].
The package also contains a power adapter to keep your device running smoothly and an HDMI cable for connecting to your television. Some Roku models, particularly the Streaming Stick variants, plug directly into your TV’s HDMI port and draw power through USB. Meanwhile, higher-end models like the Roku Ultra include premium features such as voice remote pro with rechargeable batteries and private listening capabilities[1].
How to Identify Your Specific Roku Model
Knowing your exact Roku model is crucial for troubleshooting and accessing compatible features. The simplest identification method involves checking the physical device, where you’ll typically find the model number printed on the bottom or back. This information also appears on the original packaging and in the product documentation that came with your device[1].
Alternatively, you can navigate through your Roku’s menu system by selecting Settings > System > About, which displays your exact model number and software version. This digital identification method proves particularly helpful when the physical labels have worn off or if you’ve purchased a used device. Recognizing your specific model ensures you download the correct software updates and access features tailored to your device’s capabilities[1].
Why Model Identification Matters for Installation
Different Roku models have varying setup requirements and compatibility considerations. For instance, Roku Streaming Sticks connect directly to HDMI ports, while Roku boxes typically require separate power connections. Moreover, newer models support advanced features like 4K HDR streaming and Dolby Atmos audio, whereas older versions might be limited to 1080p resolution[1].
Understanding your model also helps determine which streaming services will perform optimally on your device. Some Roku models work better with specific IPTV subscription services due to processing power and memory considerations. Additionally, if you’re considering testing services before committing, knowing your model helps ensure compatibility with IPTV free trial offers available for your specific device[1].
Pre-Installation Preparation Steps
Before beginning the installation process, gather all necessary components and verify you have the required connections on your television. Ensure your TV has an available HDMI port, as this serves as the primary connection point for most Roku devices. Additionally, locate a power outlet near your television setup, since Roku devices require continuous power during operation[1].
Check that your remote has fresh batteries installed, and consider having your Wi-Fi network name and password readily available. This preparation significantly streamlines the setup process. Meanwhile, if you plan to explore various streaming options, researching IPTV subscription guides beforehand can help you make informed decisions about which services to activate once your Roku is operational[1].
Connecting Your Roku Device to Power and TV
Begin by locating the power adapter and USB cable included with your Roku device. Connect the USB cable to the power adapter, then plug the other end into the power port on your Roku. Finally, plug the power adapter into a working electrical outlet. Many modern Roku models use micro-USB power connections, while some higher-end models may feature a dedicated power brick[2].
For optimal performance, avoid using USB ports on your TV to power your Roku device, as these may not provide sufficient power for all functions. Instead, always use the included power adapter connected directly to a wall outlet. This ensures your Roku receives consistent power and prevents potential performance issues during setup and use[2].
HDMI Connection Process
With your Roku powered on, locate an available HDMI port on your television. Most modern TVs have multiple HDMI ports typically located on the back or side panel. Connect one end of the HDMI cable (included with your Roku) to your Roku device and the other end to an available HDMI port on your TV. Make note of which HDMI input number you’ve used (HDMI 1, HDMI 2, etc.), as you’ll need this information shortly[2].
If you have an older television without HDMI ports, Roku offers specific models compatible with composite connections (red, white, and yellow cables). However, for the best streaming quality and access to all features, HDMI connection is strongly recommended[2].
Completing the Initial Setup Process
Turn on your television and use your TV remote to select the corresponding HDMI input where you connected your Roku. You should see the Roku logo appear on your screen, indicating the device is powering up. The initial setup process will begin automatically, guiding you through language selection, network connection, and software updates[2].
During this phase, ensure your Roku remote has batteries installed and is functioning properly. Most Roku devices include either an infrared (IR) or wireless remote. Point IR remotes directly at your Roku device, while wireless remotes can operate from anywhere in the room[2].
Network Connection and Software Updates
The initial setup will prompt you to select your preferred language. Afterwards, the most critical step is connecting to your Wi-Fi network. Your Roku device will automatically search for available networks. Select your home network from the list and enter your Wi-Fi password when prompted. A successful connection is essential for downloading updates and accessing streaming content[3].
For a stable streaming experience, especially for services that require a consistent connection like IPTV subscriptions, a strong Wi-Fi signal is recommended. If possible, consider using an Ethernet cable for a wired connection to your router to minimize buffering[3].
Once connected to the internet, your Roku will automatically check for and download the latest software updates. This process is vital as it provides new features, security patches, and performance improvements. Do not unplug your Roku during this update. The device will restart once the installation is complete[3].
Creating and Activating Your Roku Account
Before you can activate your Roku device, you need to create a Roku account. This free account links your device to Roku’s services and payment methods. Visit Roku’s official signup page to begin the process[4].
You’ll need to provide a valid email address and create a password. Additionally, you must add a payment method, such as a credit card or PayPal account. Roku requires this for channel purchases and subscriptions, even if you plan to use free services. Your payment information is securely stored for future transactions[4].
Linking Your Account to Your Roku Device
After the software update, your TV screen will display an activation code and instructions. You will need to visit roku.com/link on a computer or smartphone and enter this code to link your Roku device to your Roku account. This step is mandatory to finalize the setup and access the channel store[3].
If you do not have a Roku account, you will be guided to create one during this process. This free account manages your device and channel preferences[3].
Troubleshooting Common Activation Issues
Sometimes, users encounter problems during activation. If your code isn’t working, ensure you’re typing it correctly without extra spaces. Also, verify that you’re signed into the correct Roku account on the activation website[4].
Connection issues can also prevent successful activation. Check that your Roku device has a stable internet connection. If problems persist, try restarting both your Roku device and your router. For more comprehensive troubleshooting, our IPTV subscription guide includes additional network setup tips that apply to various streaming devices[4].
Pairing and Understanding Your Roku Remote
After completing your Roku device setup, the next essential step is pairing your remote. This process enables full control over your streaming experience. Most Roku devices automatically pair with their included remote during initial setup, but if you’re using a replacement or enhanced remote, manual pairing may be necessary[5].
Automatic vs. Manual Pairing Methods
Standard infrared (IR) remotes typically work immediately with your Roku device. However, enhanced voice remotes and gaming remotes require a wireless connection. For automatic pairing, simply point your remote at the Roku device and press any button. The pairing process usually completes within 30 seconds[5].
If automatic pairing fails, manual pairing becomes necessary. Remove the battery cover from your remote and press the pairing button for 3-5 seconds. The pairing light should begin flashing, indicating it’s ready to connect. Meanwhile, navigate to your Roku’s Settings menu using either the mobile app or an already-paired remote[5].
Essential Navigation Controls and Advanced Features
The directional pad allows movement through menus and selection of content. The OK button confirms selections, while the back button returns to previous screens. Playback controls include play/pause, rewind, and fast-forward functions that work across most streaming applications[5].
Voice remotes enable searching by speaking into the built-in microphone. Simply press the voice button and speak your search terms, movie titles, or actor names. The remote processes your request and displays relevant results. This feature significantly speeds up content discovery compared to manual text entry[5].
Troubleshooting Common Remote Issues
Remote connectivity problems can occasionally occur. If your remote becomes unresponsive, first check the batteries and replace them if necessary. Reset the connection by removing batteries for one minute, then reinsert them and attempt pairing again[5].
For persistent issues, perform a system restart on your Roku device. Navigate to Settings > System > System restart, or simply unplug the power cord for 10 seconds before reconnecting. This often resolves temporary software glitches affecting remote functionality[5].
How to Add and Manage Channels
Once your Roku device is set up and connected to the internet, the next step is to populate it with your favorite streaming channels. The Roku Channel Store is your central hub for this, offering thousands of free and paid options. To begin, navigate to the home screen using your remote and select “Streaming Channels” to open the store[6].
From here, you can browse featured apps, search for specific services by name, or explore categories like “Movies & TV” or “Sports.” When you find a channel you want, select it and click “Add Channel.” The app will automatically download and install onto your home screen. For popular services, you can often find direct links on our main blog page to guide you[6].
Installing and Activating Subscription Services
Many popular channels, such as Netflix, Hulu, and Disney+, require a separate subscription. After adding one of these channels, you will typically need to activate it. Open the newly installed channel, and it will display an activation code along with a website URL[6].
Visit this website on a computer or smartphone, enter the code, and log in with your subscription credentials. This links your account and grants you full access. If you’re exploring different content options, our complete IPTV subscription guide offers a deep dive into alternative services[6].
Organizing Your Channel Lineup
As you add more channels, keeping your home screen organized becomes essential for a smooth viewing experience. You can easily rearrange your channels directly from the home screen. Simply highlight a channel icon, press the asterisk (*) button on your remote, and select “Move channel”[6].
Use the directional pad to place it in your desired position. Furthermore, you can create your own custom categories. Press the asterisk button while on the home screen, choose “Add/Remove Channels,” and then “Create a Category” to group similar apps, like “Sports” or “Kids”[6].
Advanced Settings and Troubleshooting
Once your Roku device is up and running, diving into the advanced settings can significantly enhance your viewing experience. For starters, adjusting the display type in the Settings > Display type menu ensures you’re getting the best possible picture quality for your specific TV. If you have a 4K TV, make sure to select a 4K resolution. Furthermore, enabling HDR or Dolby Vision if your hardware supports it can provide richer colors and greater contrast[7].
Audio settings are equally important. In the Audio menu, you can change the format to suit your sound system. For instance, selecting Dolby Digital Plus or enabling Night Mode can dramatically improve audio for movies or late-night viewing. Another powerful feature is the Private Listening mode, which allows you to listen through headphones connected to your mobile device via the Roku app, perfect for not disturbing others[7].
Solving Common Roku Problems
Even the most reliable devices can encounter issues. A frequent problem is a frozen or unresponsive Roku. The simplest fix is often a system restart from the Settings > System > System restart menu. If the device is completely frozen, unplugging it from power for 30 seconds and then plugging it back in performs a hard reset[7].