Nvidia Shield Setup The Complete Streaming Device Guide
Chapter 1: Unboxing and Initial Hardware Setup
What’s in the Box?
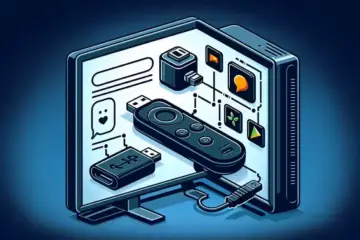
Opening your new Nvidia Shield reveals a carefully curated set of components designed for a complete entertainment experience. You’ll find the main Shield TV device, a sleek and compact media streamer that houses the powerful processing hardware. The package includes the distinctive Shield remote control, known for its triangular design and backlit functionality. Additionally, you receive the Shield controller for gaming, a power adapter, and a high-speed HDMI cable to connect to your television. For users seeking the ultimate audio experience, some models may also include a dedicated power cable for the controller’s charging base.
Connecting to Your TV and Power
Setting up your Shield begins with proper physical connections. First, locate an available HDMI port on your television, preferably an HDMI 2.0 or later port to support 4K HDR content. Connect one end of the included HDMI cable to this port and the other to your Shield device. Next, plug the power adapter into the Shield and connect it to a wall outlet. For optimal performance, ensure your television is set to the correct HDMI input source using your TV remote. Many users find it helpful to use quality streaming services to test their setup once complete.
Power Considerations
Always use the provided power adapter rather than third-party alternatives to ensure stable operation. The Shield requires consistent power delivery for optimal performance, particularly when streaming high-bitrate 4K content. Position the device in a well-ventilated area to prevent overheating during extended viewing sessions.
Understanding the Remote Control
The Nvidia Shield remote stands out with its unique triangular shape and thoughtful feature set. The top section includes a circular directional pad for navigation, surrounded by menu, home, and back buttons. Notably, the remote features dedicated buttons for popular streaming services like Netflix and YouTube, providing instant access to these platforms. Perhaps most impressively, the remote automatically backlights when picked up, making it easy to use in dark home theater environments. Additionally, it includes a built-in lost remote locator function and voice search capability through Google Assistant integration.
Physical Setup Best Practices
Proper placement of your Shield device significantly impacts both performance and convenience. Position the unit where it has adequate airflow on all sides, avoiding enclosed entertainment centers that might trap heat. Ensure the infrared receiver on the front of the device has a clear line of sight to your seating area if you plan to use the included remote. For households with multiple streaming devices, consider labeling HDMI ports or using different colored cables to avoid confusion. Meanwhile, keep the remote and controller within easy reach of your primary viewing position.
Cable Management Tips
Organize your cables using twist ties or velcro straps to maintain a clean entertainment center appearance. Route power cables away from HDMI and Ethernet cables to minimize potential interference. If using wired internet connection, ensure the Ethernet cable is securely plugged into both your router and Shield device for the most stable connection possible.
Following these setup steps carefully ensures your Nvidia Shield performs optimally from day one. Once physically configured, you’ll be ready to proceed with the initial software setup and explore the device’s extensive streaming capabilities, including various IPTV subscription options available for enhanced content access.
Chapter 2: First-Time System Configuration
Initial Setup and Language Selection
When you first power on your Android TV device, you’ll be greeted by a welcome screen that guides you through the essential setup process. Begin by selecting your preferred language from the available options. This choice affects not only the interface but also voice commands if you’re using Google Assistant. Most modern Android TV devices support multiple languages, allowing you to customize your experience from the very start.
Connecting to Your Network
Next, you’ll need to establish an internet connection. Android TV devices offer both Wi-Fi and Ethernet options for connectivity. For Wi-Fi setup, select your network from the available list and enter your password. Alternatively, you can connect via Ethernet cable for a more stable connection, which is particularly beneficial for streaming high-quality content without interruptions.
According to Google’s official Android TV support documentation, a stable internet connection is crucial for accessing streaming services and downloading apps. For optimal performance with services like IPTV, consider using a wired connection whenever possible to minimize buffering and ensure smooth playback.
Google Account Integration
Linking your Google account is a critical step that unlocks the full potential of your Android TV device. This integration allows you to access the Google Play Store for app downloads, sync your preferences across devices, and utilize personalized features. If you don’t have a Google account, the system provides an option to create one during the setup process.
Your Google account enables several key functions:
- Personalized content recommendations based on your viewing history
- Access to purchased content from Google Play Movies and TV
- Sync capabilities with other Android devices
- Voice control through Google Assistant
System Updates and Maintenance
After completing the initial account setup, your device will automatically check for system updates. Installing these updates is essential for security patches, performance improvements, and access to new features. The update process typically takes a few minutes and may require your device to restart.
Regular updates ensure compatibility with the latest streaming services and applications. For instance, many IPTV services frequently update their applications to enhance performance and add new channels. Keeping your system updated guarantees the best possible experience with these services.
Optimizing Your Setup for Streaming
Once the basic configuration is complete, consider these additional steps to optimize your streaming experience. First, adjust display settings to match your television’s capabilities, including resolution and HDR support. Second, explore the audio settings to configure surround sound or other audio enhancements if supported by your home theater system.
For users interested in IPTV services, proper device configuration is particularly important. Many providers offer free trials that allow you to test their service before committing to a subscription. Ensure your device is properly configured to take full advantage of these trial periods.
Additionally, when considering 4K streaming options, verify that your device supports the necessary codecs and that your internet connection can handle the bandwidth requirements. Our comprehensive 4K IPTV guide provides detailed information about quality considerations and technical requirements for high-definition streaming.
Remember that proper initial configuration lays the foundation for all future streaming activities. Taking the time to complete each step carefully will result in a more seamless and enjoyable viewing experience with your Android TV device.
Chapter 3: Essential Streaming App Installation
How to Install Popular Streaming Apps
Installing streaming applications is your first step to unlocking entertainment. Most modern streaming devices, including Roku, Amazon Fire TV, Apple TV, and Google Chromecast, feature a dedicated app store. For example, on a Fire TV Stick, you navigate to the Amazon Appstore, while Roku devices use the Roku Channel Store. Simply use the search function to find your desired app.
Once you locate an app like Netflix or Disney+, select it and choose the “Install” or “Add Channel” option. The download process is typically automatic and quick. After installation, the app icon will appear on your device’s home screen. For a wider selection of apps, including various IPTV services, exploring your device’s store is essential.
Setting Up and Linking Your Accounts
After installation, you need to activate the app. Launch it, and you will usually be presented with an activation code. Using a computer or smartphone, visit the specific activation website for that service (e.g., netflix.com/activate for Netflix). Log in with your existing subscription credentials and enter the on-screen code to link your device.
If you don’t have an account, most apps will guide you through the sign-up process directly. This often involves selecting a subscription plan and entering payment details. Remember, many services, including some IPTV providers, offer free trials, allowing you to test the service before committing financially.
Organizing Your Apps for Easy Access
A cluttered home screen can make finding your favorite apps frustrating. Fortunately, most streaming platforms allow you to reorganize your channels. On a Roku device, you can press the asterisk (*) button on your remote while hovering over an app to bring up a menu with options to move it.
Similarly, on Amazon Fire TV, you can move apps to the top row for easier access or even create folders to group similar services together. Taking a few minutes to arrange your most-used apps, whether it’s Netflix, a sports streaming service, or your preferred 4K IPTV subscription, will significantly improve your user experience.
Managing Multiple Streaming Subscriptions
As you accumulate streaming services, managing passwords and billing cycles can become cumbersome. Consider using a password manager to securely store your login information. Furthermore, keep track of your subscription renewal dates to avoid unexpected charges.
It’s also a good practice to periodically review your active subscriptions and cancel any you no longer use. For services you are considering, always check if a reliable free trial is available to ensure the content library and streaming quality meet your expectations before the paid period begins.
Chapter 4: Advanced Audio and Video Settings
Unlocking 4K HDR and Dolby Vision
To experience content as the creators intended, enabling 4K High Dynamic Range (HDR) is essential. This technology provides a wider range of colors and a greater contrast between the brightest whites and the darkest blacks. For the best results, you must ensure your streaming device, television, and the content itself all support 4K HDR. Popular formats include HDR10, HDR10+, and Dolby Vision. Dolby Vision is a dynamic metadata format that adjusts the picture settings on a scene-by-scene or even frame-by-frame basis for optimal performance [Source: Dolby Laboratories].
To activate these features, navigate to your device’s display settings. On platforms like the NVIDIA Shield TV or Apple TV 4K, you’ll find options to enable 4K and select your preferred HDR format. Furthermore, a high-speed HDMI cable is non-negotiable. You need an HDMI 2.0 cable or newer to transmit the large amount of data required for 4K HDR signals without compression or quality loss.
Calibrating Your Display for Accuracy
While modern TVs often have vibrant “Vivid” or “Dynamic” picture modes, these are rarely accurate. For a true-to-life image that reduces eye strain, you should calibrate your display. Start by selecting a “Movie,” “Cinema,” or “Calibrated” picture mode, as these are typically the most color-accurate out of the box. From there, you can adjust key settings like brightness, contrast, and color.
For a professional-level calibration, you can use tools like the AVS HD 709 calibration disc or built-in patterns on streaming devices. However, many modern TVs also offer automated calibration using your smartphone’s camera, such as the feature found on Google TVs. Proper calibration ensures that the stunning 4K content from your 4K IPTV subscription is displayed with perfect clarity and color fidelity.
Immersive Audio with Dolby Atmos and DTS:X
Advanced video is only half of the cinematic experience; immersive audio completes it. Object-based audio formats like Dolby Atmos and DTS:X add a height channel to the soundscape, making it feel like effects such as rain or helicopters are coming from above and all around you. Unlike traditional channel-based audio, these formats treat sounds as individual objects that can be precisely placed in a three-dimensional space [Source: Dolby Laboratories].
To use Dolby Atmos, your streaming device (e.g., Amazon Fire TV Cube, Apple TV 4K), your audio system (a compatible soundbar or AV receiver), and the streaming service must all support the format. You can usually find the audio format settings within the “Sound” or “Audio” section of your device’s menu. Enabling these settings will transform your viewing, especially when paired with a high-quality IPTV service that offers content with advanced audio tracks.
Optimizing Audio Output Settings
If you don’t have a Dolby Atmos system, you can still optimize your audio. For example, if you are using a soundbar, ensure that “Surround Sound” or “DTS Virtual:X” is enabled to create a wider soundstage. If you are connecting to an AV receiver, set your streaming device to output audio in “Bitstream” or “Passthrough” mode. This crucial setting allows your receiver to decode the original audio signal, rather than having the streaming device decode it first, which can sometimes compress the quality.
Meanwhile, for those using just their TV’s speakers, look for a “Dialogue Enhancer” or “Night Mode” setting. These can make speech clearer and compress the dynamic range so that loud explosions and quiet whispers are closer in volume, which is ideal for late-night viewing.
Network and Streaming Quality Settings
Your advanced picture and sound settings are irrelevant if your network can’t keep up. For consistent 4K streaming, a stable and fast internet connection is paramount. Most services recommend a minimum of 25 Mbps for a single 4K stream, but more is better, especially if other devices are using the network simultaneously.
For the most reliable connection, use a wired Ethernet cable whenever possible. If you must use Wi-Fi, ensure your router is on the 5 GHz band, which is less congested than the 2.4 GHz band and offers higher speeds. Additionally, many streaming devices and modern routers support Wi-Fi 6, which provides greater efficiency and performance in crowded network environments. Proper network configuration ensures that you can fully enjoy the high-bitrate streams from services you might test during an IPTV free trial.
Chapter 5: Storage and Network Optimization
Expanding Your Storage Capacity
Many streaming devices offer limited internal storage, which can quickly fill up with apps and media files. Fortunately, you have several options to expand your capacity. Most modern streaming devices support USB external hard drives or flash drives for additional storage. For example, the NVIDIA Shield TV Pro includes two USB 3.0 ports perfect for connecting high-capacity drives. Alternatively, some devices like the Fire TV Cube support network-attached storage (NAS) systems, allowing you to access media files across your home network without using device ports.
When selecting external storage, consider both capacity and speed. Solid-state drives (SSD) offer faster data transfer rates than traditional hard disk drives (HDD), which can improve loading times for large media files. For optimal performance with 4K content, choose drives with USB 3.0 or higher connectivity. Additionally, many streaming devices require you to format external drives to specific file systems like NTFS or FAT32 before use, so check your device’s specifications first.
Setting Up Network Streaming with Plex or Kodi
Media server applications like Plex and Kodi transform your streaming device into a powerful entertainment hub by organizing and streaming your personal media collection. Plex operates as a client-server system where you install the Plex Media Server on a computer or NAS device, then access your content through the Plex app on your streaming device. The platform automatically fetches metadata, artwork, and subtitles, creating a polished interface similar to commercial streaming services.
Kodi takes a different approach, functioning as a standalone media player that you can customize with various add-ons and skins. While it doesn’t require a separate server, you can configure Kodi to access network shares and external databases. Both platforms support a wide range of file formats and can handle high-bitrate 4K content when properly configured. For optimal performance, ensure your media server or source device is connected via Ethernet rather than Wi-Fi, especially when streaming large files.