Nvidia Shield Setup The Complete Streaming Device Guide
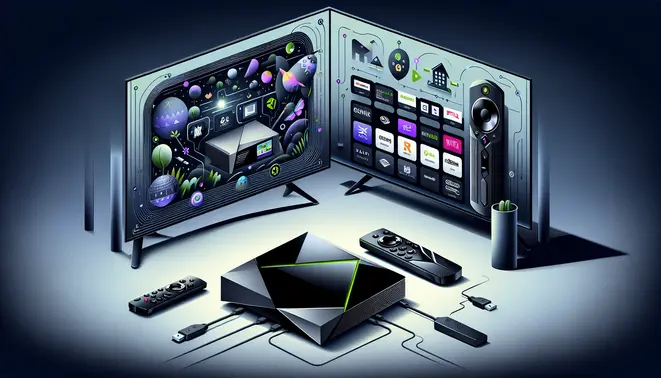
Table of Contents
- What’s Inside the Nvidia Shield Box
- Making the Physical Connections
- Walking Through the First-Time Setup Wizard
- Setting Up Your Google Account
- Installing Your Favorite Streaming Apps
- Network Setup and Optimization
- Advanced Features and Integration
- Optimizing Display and Audio Settings
- Troubleshooting Common Issues
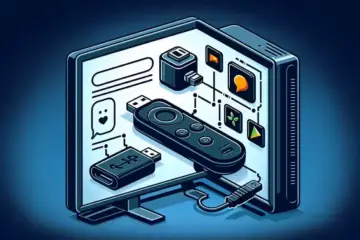
What’s Inside the Nvidia Shield Box
When you unbox your new Nvidia Shield, you’ll find several essential components ready for setup. The package includes the Shield TV device itself, which serves as your streaming hub. Additionally, you’ll discover the Shield Remote, designed for intuitive navigation with dedicated streaming service buttons. The box also contains a power adapter to keep your device running and an HDMI cable for connecting to your television. Finally, Nvidia provides clear documentation to guide you through the initial setup process.
Making the Physical Connections
Begin by connecting your Shield to your television using the included HDMI cable. Plug one end into an available HDMI port on your TV and the other into your Shield device. For optimal performance, consider using HDMI 2.0 or higher ports if available on your television. Next, connect the power adapter to your Shield and plug it into a wall outlet. Meanwhile, ensure your television is set to the correct HDMI input source that corresponds to where you connected your Shield.
If you plan to use wired internet, you can connect an Ethernet cable to the Shield’s Ethernet port for a more stable connection. However, most users prefer the convenience of Wi-Fi, which we’ll configure during the software setup. Additionally, if you have external storage or peripherals, the Shield features USB ports for expanded connectivity options.
Walking Through the First-Time Setup Wizard
Once powered on, your Shield will automatically launch the setup wizard. First, you’ll select your preferred language and agree to the terms of service. The system will then check for any available software updates – it’s crucial to install these to access the latest features and security improvements. Following this, you’ll proceed to network configuration.
Connecting to Your Wi-Fi Network
The Shield will scan for available wireless networks and display them in a list. Select your home Wi-Fi network from this list and enter your password using the on-screen keyboard. For stronger signal reliability, ensure your Shield is within reasonable range of your router. If you encounter connection issues, consider moving your router closer or using the Ethernet connection mentioned earlier. After successfully connecting, the system will test your internet speed to optimize streaming performance.
Completing the Initial Configuration
Following the Wi-Fi setup, you’ll be prompted to sign in to your Google account. This step is essential for accessing the Google Play Store and syncing your preferences across devices. You can then choose whether to enable Google Assistant voice controls and configure other privacy settings according to your preferences. Finally, the system will guide you through installing popular streaming applications and customizing your home screen layout.
After completing these steps, your Nvidia Shield will be ready to deliver high-quality streaming content. For those interested in expanding their entertainment options, our complete IPTV subscription guide provides valuable information about additional streaming services you can access through your new device.
Setting Up Your Google Account
Your first step with any new Android TV device is setting up a Google account. This account serves as your gateway to the Google Play Store, personalized recommendations, and synchronization across devices. If you already have a Gmail account, you can use those credentials directly. For new users, the setup process will guide you through creating an account directly on your TV or via a companion app on your smartphone.
During this process, you’ll be prompted to agree to Google’s Terms of Service and privacy policies. Many users prefer to review these settings carefully, as they control data collection for personalized advertising and usage analytics. You can always adjust these preferences later through your device’s settings menu.
Installing Essential Streaming Applications
Once your Google account is active, navigate to the Google Play Store to download essential streaming apps. The specific applications you’ll need depend on your preferred content sources, but most users benefit from installing these core apps:
- Streaming Services: Netflix, Disney+, Amazon Prime Video, Hulu
- Live TV Options: YouTube TV, Sling TV, or dedicated IPTV applications
- Utility Apps: File managers like X-Plore File Manager for local media playback
- Music Services: Spotify, YouTube Music, or Pandora
If you’re exploring IPTV subscription options, many providers offer dedicated applications available through the Play Store or via direct APK installation. Always verify that any third-party applications come from reputable sources to maintain device security.
Performing System Software Updates
Keeping your Android TV device updated is crucial for security, performance, and access to the latest features. Manufacturers regularly release updates that patch vulnerabilities and improve system stability. To check for updates, navigate to Settings > Device Preferences > About > System update.
Most modern Android TV devices support automatic updates, which we recommend enabling for consistent protection. However, if you prefer manual control, you can disable this feature and check for updates periodically. Major Android version updates sometimes introduce significant interface changes or new functionality, so it’s worth reviewing update notes before proceeding.
According to Android’s official documentation, security patches are typically delivered monthly for supported devices. If your device hasn’t received updates in several months, it may be approaching the end of its support lifecycle.
Configuring Privacy and Security Settings
Android TV devices collect various data to personalize your experience, but you have significant control over what information is shared. We recommend reviewing these key privacy settings during initial setup:
Advertising and Usage Data Controls
Navigate to Settings > Device Preferences > Privacy to access advertising controls. Here you can opt out of personalized ads, which limits targeted advertising but doesn’t reduce ad quantity. Additionally, you can disable usage and diagnostic data sharing, which prevents your viewing habits from being sent to Google and app developers.
Application Permissions Management
Each application requests specific permissions to function properly. While most requests are legitimate, it’s wise to periodically review these permissions through Settings > Apps > [App Name] > Permissions. For example, a weather application shouldn’t require access to your microphone, while a voice-controlled app reasonably would.
Network Security Considerations
Since streaming devices handle significant data transfer, ensuring network security is paramount. If using your Android TV with IPTV services through free trials or paid subscriptions, consider using a VPN for encrypted connections. This protects your viewing activity and can help bypass geographical restrictions for certain content.
The Federal Trade Commission recommends changing default router passwords, enabling network encryption, and creating guest networks for IoT devices like streaming boxes. These measures create additional layers of protection for your streaming activities and personal data.
Finally, establish a routine for periodically checking these settings, as updates can sometimes reset preferences to default values. Taking these proactive steps during initial setup ensures a secure, optimized streaming experience from day one.
Installing Your Favorite Streaming Apps
Getting started with your new streaming device means installing the apps you love. First, navigate to your device’s app store, such as the Google Play Store on Android TV devices or the Amazon Appstore on Fire TV. From there, you can search for and download major services like Netflix, Disney+, Hulu, and Max. The installation process is typically automatic and only requires a few clicks. Once installed, these apps will appear on your device’s home screen or in a dedicated apps section for easy access.
Linking Your Subscription Accounts
After installation, the next crucial step is signing into your accounts. Open each app and select the “Sign In” option. You will usually be presented with two choices: entering your email and password directly on the device or using a simpler activation method. For enhanced security and convenience, the activation code method is highly recommended. The app will display a unique code; simply visit the associated website on your computer or smartphone, enter the code, and log in with your credentials. This securely links your subscription without typing on a remote.
For users exploring a wider range of content, our guide on the best IPTV subscription services offers insights into platforms that aggregate numerous channels and on-demand libraries into a single app.
Organizing Your Streaming Library
A well-organized interface prevents endless scrolling and helps you find content faster. Most modern streaming devices allow you to customize the home screen. You can often pin your most-used apps to the top row for instant access. Furthermore, some platforms feature a “Watchlist” or “My Stuff” section that aggregates shows and movies you’re interested in across different apps. Taking a few minutes to curate these lists ensures your favorite entertainment is always front and center.
Mastering Voice Search for Efficiency
Voice search is a game-changer for navigating vast content libraries. To use it, press and hold the voice button on your remote (common on Roku, Fire TV, and Google TV devices) and speak your request clearly. You can search for a specific title, actor, or even genre. For example, saying “show me action movies with Tom Cruise” will pull up relevant results from across your installed apps. This feature saves significant time and is especially useful when you know what you want to watch but can’t remember which service it’s on.
As you expand your streaming options, you might consider testing services before committing. Many providers, including various IPTV services, offer a free trial period to ensure the platform meets your needs and works seamlessly with your device.
By methodically installing apps, linking accounts, organizing your library, and utilizing voice commands, you transform your streaming device from a simple piece of hardware into a powerful, personalized entertainment hub.
Network Setup and Optimization
Establishing a reliable network connection is the foundation of high-quality streaming. For optimal performance, a wired Ethernet connection generally provides greater stability and faster speeds than Wi-Fi. However, modern wireless standards can also deliver excellent results when configured correctly.
Wired vs. Wireless Connections
An Ethernet cable directly connecting your streaming device to your router offers the most consistent performance, eliminating potential Wi-Fi interference. This is particularly beneficial for streaming high-bitrate 4K HDR content or for households with multiple connected devices. If a wired connection isn’t practical, ensure your device is connected to your router’s 5GHz Wi-Fi band, which is less congested and offers faster speeds than the 2.4GHz band, though it has a slightly shorter range.
Testing Your Network Speed
Before streaming, verify that your internet connection meets the necessary requirements. Use a free online speed test tool like Speedtest by Ookla to measure your download speed. For standard high-definition (HD) streaming, a minimum of 5 Mbps is recommended. Meanwhile, streaming in 4K Ultra HD typically requires at least 25 Mbps. If multiple people in your household are using the internet simultaneously, you will need even higher speeds to accommodate the total bandwidth demand.
Managing Device Storage
Insufficient storage can cause streaming apps to lag or crash. Regularly check your device’s available storage in its settings menu. To free up space, clear the cache for individual streaming apps and uninstall applications you no longer use. For devices that support it, using a microSD card or external USB storage can provide additional space for apps and downloaded content, helping to maintain smooth performance.
Adjusting Performance Settings
Most streaming devices and apps include settings that can enhance your viewing experience. For instance, you can often manually adjust video quality settings within an app to match your internet speed, preventing constant buffering. Additionally, enabling features like “Match Content” or “Match Frame Rate” on devices such as Apple TV or Nvidia Shield can ensure videos play at their original resolution and frame rate, providing a more cinematic experience. For a deeper dive into services that offer high-quality streams, explore our complete guide to the best IPTV subscriptions.
Finally, a simple but effective tip is to periodically restart your streaming device and router. This clears temporary memory and can resolve many minor connectivity and performance issues, ensuring you get the best possible picture and sound from your service, whether you’re on a free trial or a long-term subscription.
Advanced Features and Integration
Pairing Gaming Controllers
Connecting gaming controllers to your streaming device opens up a world of entertainment beyond video. Most modern devices, including the NVIDIA Shield TV and Fire TV, support popular Bluetooth controllers like the Xbox Wireless Controller and PlayStation DualSense. The pairing process is typically straightforward. First, put your controller into pairing mode—this usually involves holding a specific button until a light flashes. Then, navigate to the Bluetooth settings on your streaming device, select your controller from the list of available devices, and confirm the connection.
For a more integrated experience, some devices offer specialized controllers. For instance, the NVIDIA Shield controller is designed to work seamlessly with the Shield TV’s gaming features. Once paired, you can use these controllers not just for gaming, but also for navigating menus, making it a versatile addition to your setup.
Setting Up a Plex Media Server
Transforming your streaming device into a personal media hub is simple with Plex. First, you’ll need to install the Plex Media Server software on a computer or NAS device in your home that will host your media files. This computer should remain on and connected to your network. After installing the server, you can organize your media libraries by pointing Plex to folders containing your movies, TV shows, music, and photos.
Next, install the Plex client app on your streaming device from its respective app store. When you open the app, it will automatically discover your Plex Media Server on the local network. After signing in with your Plex account, you’ll have instant access to your entire personal media collection, beautifully organized with metadata, artwork, and descriptions automatically fetched by Plex.
Advanced Plex Features
Beyond basic streaming, Plex offers powerful features like remote access, allowing you to enjoy your media from anywhere. You can also enable hardware acceleration for better transcoding performance, especially useful when streaming to multiple devices simultaneously. For those with large collections, Plex’s robust metadata agents ensure your content is properly identified and organized.
Using Google Assistant Voice Commands
Devices like the NVIDIA Shield TV with Google Assistant integration respond to a wide range of voice commands for hands-free control. You can launch apps by saying “Open Netflix” or play specific content with commands like “Play Stranger Things on Netflix.” Beyond media control, Assistant can handle smart home commands, answer questions, set reminders, and control playback—all through your voice.
To get the most from voice commands, ensure your device’s microphone is enabled and you’re speaking clearly. Popular commands include “What’s the weather today?”, “Pause the movie,” “Turn up the volume,” and “Show me action movies.” The more you use voice commands, the more natural they’ll feel as part of your streaming routine.
Exploring Smart Home Integration
Modern streaming devices serve as excellent smart home hubs, particularly when they include Google Assistant or Alexa. The NVIDIA Shield TV, for example, can control compatible smart lights, thermostats, and security cameras through voice commands or the interface. You can create routines like “Movie Night” that dim the lights, lower the thermostat, and launch your streaming app simultaneously.
Integration extends to other smart devices too. With proper setup, you can view video feeds from security cameras on your TV, control smart plugs that power other entertainment devices, or even receive notifications from other smart home systems. This convergence of entertainment and home automation creates a truly connected living experience where your streaming device becomes the central control point for both media and your smart home ecosystem.
For those interested in expanding their entertainment options further, our guide on IPTV subscriptions explores additional content sources that can integrate with your streaming setup.