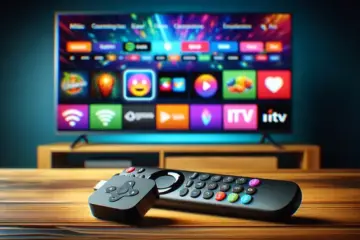
How To Install Kodi IPTV On Firestick The Complete Guide

What is Kodi IPTV and Why Use It on Firestick?
Kodi IPTV represents a powerful combination of open-source media software and Internet Protocol Television technology. This integration transforms your Amazon Firestick into a comprehensive entertainment hub capable of streaming live television, on-demand movies, and TV shows directly over the internet. Unlike traditional cable or satellite services, Kodi IPTV delivers content through internet protocols, offering unprecedented flexibility and control over your viewing experience.
The Kodi platform serves as a versatile media center that organizes and plays your content, while IPTV provides the streaming technology to access live and on-demand programming. When installed on a Firestick device, this combination creates a streamlined entertainment solution that connects directly to your television. This setup eliminates the need for multiple streaming subscriptions and hardware components, consolidating your entertainment into a single, user-friendly interface.
Key Benefits of Kodi IPTV on Firestick
Firestick users enjoy several distinct advantages when implementing Kodi IPTV solutions. The device’s compact design and affordable price point make it accessible to virtually any budget, while its powerful streaming capabilities ensure smooth playback of high-quality content. Moreover, the Firestick’s portability means you can take your complete entertainment system anywhere – from your living room to hotel rooms during travel.
One of the most significant benefits is the cost savings compared to traditional cable packages. Many IPTV services offer comprehensive channel lineups at a fraction of the cost of cable subscriptions. Additionally, Kodi’s extensive customization options allow users to tailor their interface, install specialized add-ons, and create personalized viewing experiences that traditional services cannot match.
Enhanced Viewing Experience and Content Access
Kodi IPTV on Firestick delivers superior content accessibility and viewing flexibility. Users can access thousands of channels from around the world, including international programming that might be unavailable through local providers. The platform supports various content types – from live sports and news to movies and specialty channels – all accessible through a single interface.
The technology also enables time-shifted viewing capabilities, allowing users to watch programs on their own schedule. Many IPTV services integrated with Kodi offer catch-up TV and cloud recording features, ensuring you never miss favorite shows. Furthermore, the combination typically supports multiple resolution options, including 4K streaming where available, providing crystal-clear picture quality that rivals or exceeds traditional broadcast standards.
Getting Started with Kodi IPTV
Setting up Kodi IPTV on your Firestick involves a straightforward process that typically takes less than 30 minutes. First, you’ll need to install the Kodi application from the Amazon Appstore or through alternative methods if unavailable. Next, selecting a reliable IPTV service provider is crucial for optimal performance. Many providers offer free trials that allow you to test their service before committing to a subscription.
Once configured, the system provides an intuitive navigation experience through Kodi’s well-organized interface. Users can browse channels by category, search for specific content, and create favorite lists for quick access. The setup also supports external players and additional customization through Kodi’s extensive add-on library, enabling further enhancement of your streaming capabilities.
For those concerned about streaming quality, premium IPTV subscriptions often include 4K content options and reliable server networks to minimize buffering. Meanwhile, the legal aspects of IPTV usage remain important to consider, with legitimate services providing properly licensed content through secure streaming protocols.
Essential Firestick Settings Before Installing Kodi IPTV
Properly configuring your Firestick before installing Kodi IPTV ensures optimal performance and security. These preliminary steps help prevent buffering issues and create a stable foundation for your streaming experience.
Enable Apps from Unknown Sources
Since Kodi isn’t available through the Amazon App Store, you must enable installation from unknown sources. Navigate to Settings > My Fire TV > Developer Options and toggle “Apps from Unknown Sources” to ON. This crucial setting allows you to sideload applications not available in the official store [Source: Amazon Developer Options].
Optimize Storage and Performance
Firestick devices have limited storage capacity, making optimization essential. Clear cache regularly by going to Settings > Applications > Manage Installed Applications. Select individual apps and choose “Clear cache” to free up space. Additionally, consider using a lightweight launcher to reduce system resource consumption and improve overall responsiveness.
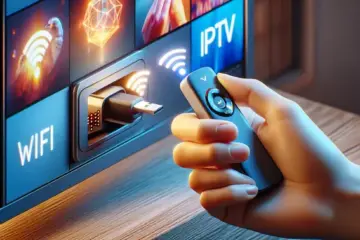
Network Configuration for Stable Streaming
A stable internet connection is critical for IPTV streaming. Connect your Firestick via Ethernet using an adapter for the most reliable connection, or ensure strong Wi-Fi signal strength. For optimal performance, use 5GHz Wi-Fi networks when available, as they typically experience less interference than 2.4GHz bands [Source: FCC Wireless Networks Guide].
Security and Privacy Considerations
Protecting your device and privacy should be a priority when streaming IPTV content. Consider installing a reputable VPN service to encrypt your internet traffic and maintain anonymity. Furthermore, regularly review app permissions and disable data collection options in your Firestick settings to limit unnecessary data sharing.
These foundational optimizations create an ideal environment for Kodi IPTV installation. Meanwhile, understanding the legal landscape of IPTV services is equally important. Our complete guide to 4K IPTV subscriptions covers crucial aspects of service legitimacy and copyright compliance.
Device Maintenance Best Practices
Regular maintenance extends your Firestick’s lifespan and performance. Restart your device weekly to clear temporary files and refresh system resources. Additionally, keep your Firestick software updated to access the latest security patches and performance improvements. Finally, uninstall unused applications to maximize available storage for Kodi and IPTV content.
By completing these preparatory steps, you’ll create an optimized foundation for Kodi IPTV installation. This approach minimizes potential technical issues and ensures a smoother streaming experience from the outset. For those still evaluating IPTV options, our comprehensive guide to IPTV free trials can help you test services before committing.
Getting Your Firestick Ready for Kodi
Before you can install Kodi, you need to adjust a single, crucial setting on your Amazon Firestick. This allows the installation of applications from outside the official Amazon Appstore, a process known as “sideloading.”
Navigate to Settings > My Fire TV > Developer Options. If you don’t see Developer Options, go to Settings > My Fire TV > About and click on “Fire TV Stick” 7 times until you see a message that you are now a developer. Once in Developer Options, turn ON the setting for “Apps from Unknown Sources” [Source: How-To Geek]. This is a mandatory step for the installation to proceed.
Method 1: Using the Downloader App (Recommended)
The Downloader app provides the most straightforward method for installing Kodi on your Firestick. It’s a simple tool that fetches and installs the Kodi application file directly onto your device.
- From your Firestick home screen, use the search function and look for “Downloader“.
- Select the Downloader app from the results and click “Download” or “Get” to install it.
- Open the Downloader app. You may see a prompt to allow access; select “Allow“.
- In the URL field, enter the following official Kodi download link: https://kodi.tv/download.
- The Downloader app will fetch the webpage. Scroll down and select the “Android” icon.
- On the next page, choose “ARMV7A (32BIT)” to download the correct version for Firestick.
- The download will begin. Once complete, the installation screen will appear. Select “Install“.
- After installation is complete, you can choose “Done” or “Open“.
For safety, it’s a good practice to return to the Downloader app’s settings and clear its cache to remove the downloaded file.
Method 2: Sideloading with an Android Sideloading Tool
If you prefer an alternative to Downloader, you can use other sideloading applications available on the Amazon Appstore. Apps like “Send Files to TV” or “Apps2Fire” can also be used to transfer the Kodi APK file from your phone or computer to your Firestick.
This method involves first downloading the Kodi APK file on another device and then using the sideloading app to send and install it on the Firestick. While effective, it involves more steps than the Downloader method.
Launching and Configuring Kodi
Once installed, you can find Kodi in your app library under “Your Apps & Channels“. The first time you open Kodi, it will take a moment to set up its initial libraries. You are now ready to explore a vast world of legal add-ons for streaming your own media library, podcasts, and more.
Kodi is a powerful, neutral media player. Its functionality is extended through add-ons. It is crucial to only install add-ons from official or trusted repositories to ensure your device’s security and to stay within legal boundaries. For those looking to stream live TV, you might explore our guide on the best IPTV subscriptions, which details legitimate services that can be used with various players.
Troubleshooting Common Installation Issues
Sometimes, you might encounter a “Parse Error” during installation. This usually means the APK file you downloaded is corrupt or incomplete. The solution is to delete the file and re-download it using the Downloader app, ensuring you have a stable internet connection.
If Kodi runs slowly, try closing other running applications on your Firestick to free up memory and processing power. For the best performance, using a 4K IPTV subscription or streaming high-quality content requires a strong and stable internet connection.
Remember, while Kodi itself is perfectly legal, the content you access through it must be from legitimate sources. Always be mindful of copyright laws and the terms of service for any streaming platform.
Setting Up IPTV Add-ons in Kodi
Kodi’s versatility as a media center becomes truly powerful when you integrate IPTV add-ons, which allow you to stream live television and on-demand content directly. The process begins by enabling installations from unknown sources. Navigate to the settings menu, select “System,” then “Add-ons,” and toggle the “Unknown sources” option to on. This crucial step permits the installation of third-party repositories that host IPTV add-ons.
Next, you’ll need to add a repository source. Return to the home screen, select “Add-ons,” and click the package icon. Choose “Install from repository” to access Kodi’s official add-on library, or select “Install from zip file” to add a third-party repository you’ve downloaded. For IPTV functionality, popular repositories like the Kodi Add-on Repository or specialized third-party sources are essential. Once the repository is installed, you can browse its video add-ons section to find and install your chosen IPTV service.
Managing Repositories for Optimal Performance
Proper repository management ensures your add-ons remain functional and up-to-date. Kodi allows you to install multiple repositories, giving you access to a wider variety of add-ons. However, it’s wise to regularly review and maintain these sources. You can manage your installed repositories by going to Settings > Add-ons > My add-ons and selecting “Repository.” From here, you can check for updates, disable, or remove repositories that are no longer needed.
A well-maintained repository list improves system stability and security. Focus on reputable sources and avoid overloading Kodi with too many repositories, as this can slow down performance. Regularly updating your repositories ensures you have access to the latest add-on versions and security patches. If an add-on stops working, checking the repository for an update is often the first troubleshooting step.
Essential Streaming Components for IPTV
Beyond the basic add-ons, several components significantly enhance your IPTV streaming experience in Kodi. The InputStream Adaptive is a critical add-on that enables playback of adaptive bitrate streams, including those protected by DRM. This component is often required for streaming services that adjust video quality based on your internet connection speed.
Another vital tool is a reliable Electronic Program Guide (EPG). An EPG provides a visual TV guide, showing you what’s currently playing and what’s coming up on your IPTV channels. Many IPTV services offer their own EPG add-ons, or you can use universal options like “IPTV Simple Client,” which comes bundled with Kodi. This client not only handles channel playlists but also integrates EPG data to recreate a traditional television viewing experience.
For users seeking comprehensive IPTV solutions, our guide on the best IPTV subscriptions covers everything from service selection to setup. Additionally, if you’re testing services, our IPTV free trial guide helps you evaluate options before committing.
Installing and Configuring Your IPTV Service
After installing the necessary components, the final step is adding your specific IPTV service. Most services provide an M3U playlist URL or XMLTV EPG URL. To configure this, install the “PVR IPTV Simple Client” add-on from the official Kodi repository. Once installed, access its settings and enter your service’s playlist URL. Restart Kodi, and your IPTV channels will appear in the “TV” section of the main menu.
Proper configuration ensures reliable streaming performance. Within the PVR IPTV Simple Client settings, you can adjust buffer settings, EPG source URLs, and channel grouping options. For optimal performance, ensure your internet connection meets the bandwidth requirements of your chosen service, especially if you’re streaming in high definition. Our Ultimate 4K IPTV Guide provides detailed information on bandwidth requirements and quality considerations for high-resolution streaming.
Remember that while Kodi itself is legal, the content sources you access may have copyright implications. Always ensure you have proper authorization for the streams you’re watching, and consider using a VPN for additional privacy and security while streaming.
Connecting Your IPTV Service
Getting started with IPTV requires connecting your subscription to a compatible device. Most users employ dedicated IPTV apps like Smart IPTV, Tivimate, or IPTV Smarters, which are available on various platforms including Android TV, Fire TV, and smart TVs. After installing your preferred app, you’ll typically need to enter your subscription credentials or upload an M3U playlist file provided by your IPTV service.
Many providers offer multiple connection methods. Some services provide dedicated apps with built-in channel lists, while others rely on universal M3U URLs that work across different applications. The connection process usually involves entering your username, password, and server URL into your IPTV player. For those using M3U playlists, you’ll typically upload the file through your app’s settings menu or enter the full URL where the playlist is hosted.
Configuring Your Playlist Settings
Proper playlist configuration significantly enhances your viewing experience. Most IPTV players allow you to customize how channels are organized and displayed. You can create favorite lists, hide unwanted channels, and set up electronic program guides (EPG) for schedule information. Configuring buffer settings can also improve streaming stability, especially if you experience occasional buffering.
Advanced users can optimize their setup by adjusting video output settings to match their display capabilities. This includes setting the correct resolution (1080p, 4K) and frame rate for smooth playback. Many apps also offer parental controls, recording functions, and multi-screen viewing options that require proper configuration during initial setup. Taking time to explore these settings ensures you get the most from your IPTV subscription.
Organizing Channel Lists Effectively
Channel organization transforms a chaotic list into a personalized entertainment hub. Start by creating categories that match your viewing habits—sports, news, movies, international channels, and specialty content. Most IPTV applications allow you to create custom groups or hide channels you never watch