HDMI No Signal Fix The Complete Streaming Device Setup Guide
Understanding the HDMI No Signal Mystery
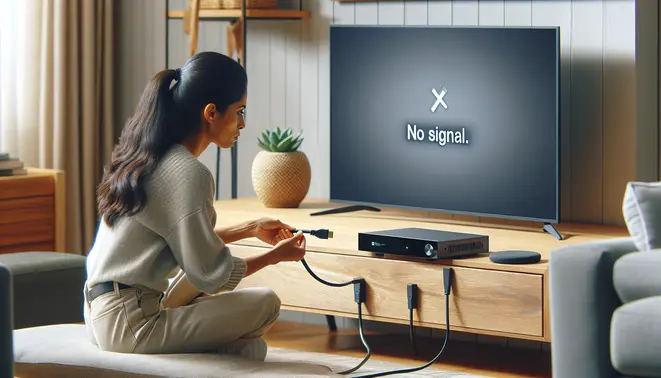
When your television displays the frustrating “No Signal” message, it’s essentially telling you that it cannot detect any active video input from the connected HDMI source. This communication error occurs when the TV’s HDMI port isn’t receiving a readable signal from your streaming device, gaming console, or cable box. The message indicates a breakdown in the handshake process between devices, where they fail to establish a proper connection and exchange necessary data.
Common Physical Connection Issues
Many HDMI signal problems stem from simple physical connection failures. Loose or improperly seated cables are among the most frequent culprits behind the “No Signal” error. Over time, HDMI ports can become worn, and cables may develop internal breaks that aren’t visible from the outside. Additionally, using damaged or low-quality cables can prevent proper signal transmission between your devices.
For streaming device users, this often manifests when connecting popular devices like Fire TV Sticks, Roku players, or Android TV boxes. These devices rely on stable HDMI connections to deliver content, and any interruption in the physical connection will trigger the “No Signal” message. Always ensure cables are firmly connected at both ends and inspect for any visible damage to the cable or ports.
HDMI Handshake Failures
The HDMI handshake is a critical communication process where connected devices authenticate and establish compatibility parameters. This digital handshake ensures that both the source device and display can communicate effectively and support the same video and audio formats. When this handshake fails, your TV displays “No Signal” because it cannot verify or process the incoming data stream.
Several factors can disrupt this handshake process, including incompatible HDCP (High-bandwidth Digital Content Protection) versions between devices, outdated firmware, or resolution conflicts. For instance, if your streaming device outputs a resolution that your TV doesn’t support, the handshake will fail. Power cycling both devices often resolves temporary handshake issues by resetting the communication process.
Input Source Selection Problems
Another common but easily overlooked cause involves incorrect input source selection. Modern televisions typically feature multiple HDMI ports, and selecting the wrong input is a simple mistake that can cause confusion. Many users mistakenly believe their device isn’t working when they’ve simply selected HDMI 2 instead of HDMI 1, or vice versa.
Additionally, some TVs have smart features that automatically switch to active inputs, but these detection systems aren’t always reliable. If you’re setting up a new IPTV subscription or streaming service, double-check that you’ve selected the correct HDMI input corresponding to where your device is connected. Using your TV remote to cycle through available inputs can quickly identify if this is the issue.
Power and Device Status Issues
The power state of your source device significantly impacts HDMI signal detection. Many users encounter “No Signal” errors simply because their streaming device, gaming console, or cable box isn’t powered on or has entered sleep mode. Some devices may appear to have power through indicator lights while actually being in a standby state that doesn’t output HDMI signals.
Furthermore, devices that have crashed or frozen will stop sending HDMI signals entirely. This is particularly common with streaming devices that may experience software glitches or memory issues. A complete power cycle—unplugging the device for 30 seconds before reconnecting—often resolves these temporary operational problems and restores the HDMI signal.
Resolution and Format Compatibility
Display resolution mismatches represent another technical cause of HDMI signal problems. When your source device outputs a resolution or refresh rate that your television cannot process, the TV will display “No Signal” because it cannot interpret the incoming data. This frequently occurs when connecting newer gaming consoles or media players to older television models.
For example, if your device is set to output 4K HDR content but your TV only supports 1080p, the incompatible signal will result in a “No Signal” message. Similarly, certain color formats or advanced features like Dolby Vision may not be supported by both devices. Accessing your device’s display settings through an alternative monitor or using default video modes can help resolve these compatibility issues.
When to Suspect Hardware Failure
While most “No Signal” issues are resolvable through troubleshooting, persistent problems may indicate hardware failure. Damaged HDMI ports, faulty cables, or failing components in either the source device or television can cause permanent signal loss. If you’ve eliminated all other potential causes and the problem persists across multiple devices and cables, hardware failure becomes increasingly likely.
Testing your equipment with alternative configurations can help identify the faulty component. Try your streaming device on another TV, or connect a different device to the same HDMI port. This process of elimination will determine whether the issue lies with your television, the source device, or the connecting cables. In some cases, professional repair or replacement may be necessary to restore proper HDMI functionality.
The Essential Pre-Setup Checklist
Inspect Your Cables and Connections
Before you begin any streaming device setup, a thorough inspection of your physical connections is the most critical first step. Faulty or low-quality cables are a leading cause of poor picture quality, audio dropouts, and frustrating connectivity issues. Start by examining your HDMI cable for any visible damage, such as bent pins, fraying, or a loose connector. For optimal performance with modern 4K and HDR content, ensure you are using a high-speed HDMI cable that is certified for the bandwidth you need.
Furthermore, check that both ends of the cable are securely plugged into your TV and streaming device. A loose connection can easily be mistaken for a more complex software problem. If you are using an ethernet cable for a wired internet connection, perform the same visual and physical check to confirm it is undamaged and firmly seated in the router and your device.
Verify Your TV’s Input and Display Settings
Once your cables are confirmed to be in good working order, the next step is to ensure your TV is configured correctly to receive the signal. Using your TV remote, navigate to the input or source menu. Select the specific HDMI port into which your streaming device is plugged. It is a common oversight to have the TV set to the wrong input, resulting in a “No Signal” message.
After selecting the correct input, delve into your TV’s picture settings. For the best viewing experience, enable features like HDR (High Dynamic Range) if your TV and content support it. Additionally, disable any post-processing effects like motion smoothing or noise reduction, as these can sometimes introduce lag or artifacts, especially with high-quality streaming content. A proper setup ensures you see the video exactly as the content creators intended.
Confirm Internet and Device Power
A stable and robust internet connection is the lifeblood of streaming. Before proceeding, verify that your Wi-Fi network is operational and that you have the correct password handy. For the most reliable performance, particularly for high-bitrate 4K streaming, a wired ethernet connection is highly recommended. You can learn more about the requirements for different services in our complete IPTV subscription guide.
Finally, double-check the power supply for your streaming device. Use the official power adapter that came with the device and plug it directly into a wall outlet, not a power strip that might be switched off. A steady power source prevents unexpected reboots and performance hiccups during the initial setup process and beyond. Following this checklist meticulously will save you time and frustration, creating a solid foundation for a seamless streaming experience. For instance, a stable setup is crucial if you plan to take advantage of an IPTV free trial to evaluate a service without technical interruptions.
Streaming Device-Specific Setup Solutions
Roku HDMI No Signal Fix
When your Roku device displays a “no signal” message, start by checking the HDMI connection. Ensure the cable is firmly seated in both your TV and Roku device. Try switching to a different HDMI port on your television, as some ports may be faulty. Next, restart your Roku by navigating to Settings > System > System restart. Alternatively, you can unplug the power cord for 30 seconds before reconnecting.
If the issue persists, verify your TV’s input source matches the HDMI port your Roku uses. Many modern televisions have multiple HDMI inputs, so cycle through them using your remote. Additionally, check for Roku system updates by going to Settings > System > System update. Outdated software can sometimes cause HDMI handshake issues with your display.
Amazon Fire TV Troubleshooting
Fire TV users experiencing HDMI connectivity problems should first attempt a simple power cycle. Disconnect the power adapter from both the device and wall outlet for two minutes. Meanwhile, test the HDMI cable with another device to rule out cable failure. When reconnecting, ensure you’re using the original power adapter that came with your Fire TV, as third-party adapters may not provide sufficient power.
For persistent issues, access your Fire TV’s display settings by holding the Home button on your remote and selecting Settings. Choose Display & Sounds > Display > Video Resolution and try selecting a lower resolution temporarily. This can help identify compatibility issues between your Fire TV and television. If successful, gradually increase the resolution until you find the optimal setting for your setup.
Apple TV HDMI Connection Solutions
Apple TV owners should begin troubleshooting by checking cable compatibility. Apple recommends using High-Speed HDMI cables for best performance. Restart your Apple TV by going to Settings > System > Restart, or unplug it for 10 seconds. Verify that your television supports the resolution configured in your Apple TV settings under Settings > Video and Audio > Format.
Another effective solution involves resetting the device’s video settings. Press and hold the Menu and Volume Down buttons on your Siri Remote simultaneously for five seconds. This resets the video output without affecting your content or settings. Additionally, ensure your television’s firmware is updated, as outdated TV software can create compatibility issues with streaming devices.
Google Chromecast Resolution
Chromecast devices often respond well to a complete power reset. Unplug the device from both power and HDMI ports, wait 60 seconds, then reconnect. Make sure you’re using the included power adapter rather than your TV’s USB port, as some televisions don’t provide adequate power through USB. Check that your Chromecast appears in the Google Home app, indicating it’s properly connected to your network.
If the no signal problem continues, try changing your television’s HDMI mode from “Auto” to a specific standard like 1.4 or 2.0 in your TV’s settings menu. Some users report success by enabling HDMI-CEC under different manufacturer names like Anynet+ (Samsung), Bravia Sync (Sony), or Simplink (LG). This feature improves communication between your Chromecast and television.
Universal HDMI Troubleshooting Steps
Regardless of your streaming platform, several universal solutions often resolve HDMI signal problems. First, inspect your HDMI cable for physical damage and try a different certified high-speed cable. Second, update your television’s firmware through its settings menu, as manufacturers regularly release patches for compatibility issues. Third, perform a factory reset on your streaming device as a last resort, remembering this will erase all your settings and preferences.
Many streaming issues can also relate to service connectivity rather than hardware problems. If you’re exploring entertainment options, our complete IPTV subscription guide provides valuable information about alternative streaming services. Before committing to any service, consider trying a free trial to evaluate performance with your specific setup.
Advanced HDMI Troubleshooting Techniques
Resolving Persistent HDCP Handshake Errors
High-bandwidth Digital Content Protection (HDCP) errors are among the most common and frustrating HDMI issues. This copy protection protocol requires a successful “handshake” between your source device (like a streaming stick), your receiver (like an A/V receiver or soundbar), and your display. When this handshake fails, it often results in a blank screen, flickering, or an error message. A primary cause is using non-compliant or poor-quality HDMI cables that cannot transmit the encryption key properly [Source: Digital Trends].
To troubleshoot, first, perform a “power cycle.” Turn off and unplug every device in your HDMI chain from power for at least two minutes. This action clears temporary caches and forces every component to renegotiate the HDCP handshake from scratch upon restart. If the problem persists, try connecting your source device directly to your television, bypassing any intermediate devices like soundbars or receivers. A successful connection this way indicates the intermediary device is the culprit. Finally, ensure you are using a [Source: HDMI Licensing Administrator] “Premium High-Speed” or “Ultra High-Speed” certified cable, as these are rigorously tested for HDCP 2.2 compliance.
Fixing Resolution and Refresh Rate Conflicts
Your devices may struggle to agree on a single resolution and refresh rate, leading to a blank screen, distorted image, or constant mode switching. This often happens when a new device, like a gaming console set to 4K@120Hz, is connected to an older AV receiver or TV that doesn’t support that specific mode. The source device sends a signal the display cannot process, causing a failure.
The most effective solution is to boot your source device in a low-resolution “safe mode.” For example, on a PlayStation 5, hold the power button until you hear a second beep to access safe mode and select a lower resolution like 1080p. On a computer, you can often do this by booting into the operating system’s safe mode. Once you have a stable picture, you can manually re-select the desired resolution, ensuring it is supported by all components in your setup. Additionally, disabling specific high-bandwidth features like VRR (Variable Refresh Rate) or HDR on your source device can help isolate the conflict before re-enabling them one by one.
The Critical Role of Firmware Updates
Many persistent HDMI issues are not caused by hardware but by software bugs that can be resolved with a firmware update. Firmware is the low-level software embedded in your TV, soundbar, AV receiver, and even streaming devices. Manufacturers regularly release updates to improve compatibility, add new features like Dolby Vision support, and fix known handshake or stability problems [Source: CNET].
To update your devices, navigate to the system or support menu in their settings. Look for an option labeled “Software Update,” “Firmware Update,” or “About.” Select “Check for Updates” and follow the on-screen instructions if one is available. For devices without a direct internet connection, such as some projectors or older receivers, you may need to download the update file from the manufacturer’s website onto a USB drive and install it manually. Keeping all your entertainment devices updated is one of the most powerful preventative measures for avoiding future HDMI headaches and ensuring you get the best performance from your IPTV subscription.
When to Consider Professional Help or Hardware Replacement
If you have exhausted all software and cable-swapping troubleshooting steps, the issue may lie with a physical hardware component. The HDMI ports on your devices can become damaged from frequent plugging and unplugging, or internal boards can fail over time. As a last resort, a factory reset of your TV or receiver can sometimes resolve deep-seated software glitches, but be aware this will erase all your custom settings and logged-in apps.
For complex setups involving matrix switches or long cable runs, signal degradation can be a factor. In these cases, an HDMI signal booster or fiber-optic HDMI cable for long distances may be necessary. If a specific device is consistently the source of problems across multiple setups, it is likely faulty and may require professional repair or replacement.
Smart TV Integration & Input Management
Understanding Your TV’s Input System
Modern Smart TVs feature multiple HDMI ports that serve as gateways for connecting external devices like streaming sticks, gaming consoles, and soundbars. Each HDMI input functions as a separate channel for specific devices, requiring proper configuration to ensure seamless operation. The key to effective input management lies in understanding how these ports interact with connected equipment and which settings optimize performance.
Most contemporary televisions include specialized HDMI ports labeled “ARC” or “eARC” (Audio Return Channel and enhanced Audio Return Channel). These particular inputs serve a dual purpose: they transmit video signals to your TV while simultaneously sending audio signals back to compatible sound systems or soundbars. This bidirectional capability eliminates the need for separate audio cables, creating a cleaner setup with enhanced audio quality.