Expand Firestick Storage Complete Streaming Device Setup Guide
Why Firestick Storage Fills Up So Quickly
Amazon Firestick devices face constant storage pressure from multiple sources. First, streaming apps themselves are growing larger, with many popular services now requiring significant space. For example, Netflix can occupy over 100MB, while Disney+ may use 150MB or more. Additionally, these apps accumulate cache data as you use them, sometimes growing to several times their original installation size.
Furthermore, temporary files and app data don’t always clear automatically. When you uninstall apps, they often leave behind residual files that continue occupying precious storage. The Fire OS operating system also requires space for updates and system files, which can consume 2-3GB alone. This combination of factors means even light users can quickly exhaust their available storage [Source: Tech Advisor].
Default Storage Capacities Across Firestick Models
Amazon’s Firestick lineup offers varying storage options that have evolved over different generations:
- Fire TV Stick (1st and 2nd Generation): 8GB total storage with approximately 5.5GB available for user content
- Fire TV Stick 4K (1st Generation): 8GB total with around 5.5GB usable space
- Fire TV Stick Lite: 8GB total storage with similar available space to previous models
- Fire TV Stick 4K Max (1st Generation): 8GB total storage
- Fire TV Stick 4K (2nd Generation) and 4K Max (2nd Generation): Increased to 16GB total with approximately 13GB available for apps and games
It’s important to note that the operating system and pre-installed apps claim a significant portion of the advertised storage, leaving less available than the total capacity suggests [Source: Digital Trends].
Clear Signs You Need Storage Expansion
Several indicators suggest your Firestick requires additional storage capacity. The most obvious sign is receiving “Storage Almost Full” or “Insufficient Storage” error messages when installing new apps or updating existing ones. Similarly, if your device becomes noticeably slower, with apps taking longer to load or experiencing frequent crashes, storage constraints are likely the culprit.
Other warning signs include being unable to download new content despite having few apps installed, or noticing that previously functioning apps now struggle to perform basic tasks. When you check your storage settings (Settings > Applications > Manage Installed Applications), if you have less than 1GB of free space remaining, expansion should be seriously considered [Source: How-To Geek].
Essential Hardware for Expanding Fire TV Storage
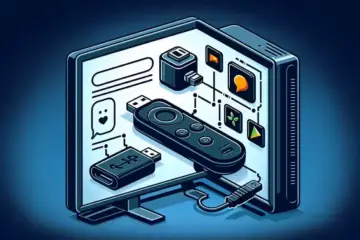
To successfully expand your Fire TV storage using a USB drive, you’ll need a few key pieces of hardware. The most crucial component is a USB On-The-Go (OTG) adapter cable. This specialized cable connects to your Fire TV Stick’s micro-USB power port and splits into two connections: one for power and one for your USB drive. Without this adapter, your Fire TV Stick cannot simultaneously receive power and access external storage.
Choosing the Right USB OTG Adapter
Not all OTG adapters are created equal. For optimal performance with Fire TV devices, look for a micro-USB to USB-A OTG cable that specifically mentions compatibility with Amazon Fire TV Sticks. These adapters typically feature a micro-USB male connector for the Fire TV, a full-size USB-A female port for your flash drive, and a separate micro-USB female port for power input. Many users have reported success with popular models available on Amazon and other electronics retailers.
Selecting a Compatible Flash Drive
When choosing a USB flash drive for your Fire TV, consider both capacity and speed. Fire TV devices support drives formatted as FAT32 or exFAT, with capacities up to 128GB for most models. However, for the best performance with media files and apps, select a USB 3.0 flash drive even though Fire TV ports are USB 2.0—the improved internal components of USB 3.0 drives typically offer better read/write speeds. Additionally, compact, low-profile flash drives are preferable as they’re less likely to obstruct other ports or become accidentally dislodged.
Power Requirements and Considerations
Proper power delivery is critical when using OTG setups. The original power adapter that came with your Fire TV device may not provide sufficient power when additional accessories are connected. Consequently, you might experience performance issues or random restarts. To prevent this, use the official Amazon power adapter or a high-quality replacement capable of delivering at least 1A/5W. Some users find that upgrading to a 2A power adapter resolves stability problems when using OTG cables with external storage.
Setup and Compatibility Verification
Before purchasing any equipment, verify that your specific Fire TV model supports USB storage expansion. Most Fire TV Stick 4K, 4K Max, and newer models offer this functionality, while some older generations may have limitations. After connecting your OTG cable and flash drive, navigate to Settings > My Fire TV > About > Storage to confirm your device recognizes the external drive. If the drive isn’t detected, try reformatting it to FAT32 using a computer, then reconnect it to your Fire TV setup.
Firestick Models with MicroSD Slots
While Amazon’s Fire TV Stick lineup has evolved significantly over the years, not all models offer the expandable storage that a microSD card slot provides. This feature is primarily found in the more powerful and recent iterations of the device. The Fire TV Stick 4K Max (1st and 2nd Gen) is the flagship model that includes a dedicated microSD slot, allowing you to expand storage by up to 1TB. This is particularly useful for users who download numerous apps or large game files.
Conversely, the standard Fire TV Stick 4K and the older Fire TV Stick (3rd Gen) and Lite models do not feature a microSD card slot. If expandable storage is a priority for your streaming setup, verifying that you have a compatible model like the 4K Max is the essential first step.
Installing a MicroSD Card in Your Firestick
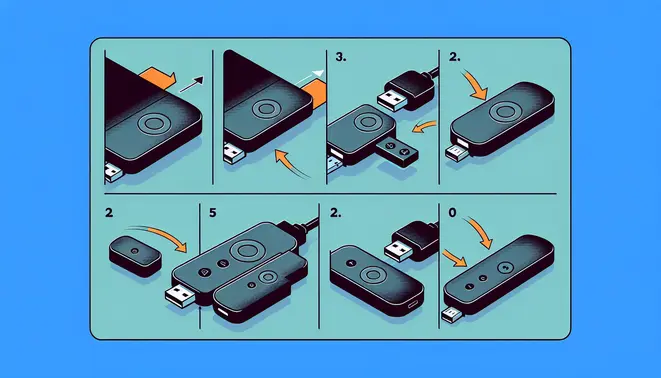
The installation process for a microSD card is straightforward. First, ensure your Firestick is unplugged. Locate the microSD slot, which is typically found on the side of the device. Carefully insert the microSD card into the slot until it clicks into place. It is designed to fit in only one orientation, so do not force it. Once inserted, plug your Firestick back into your TV’s HDMI port and power it on.
Your Fire TV device should automatically detect the new storage. You will likely see a prompt to format the card. This process prepares the card for use with your device and will erase any existing data, so be sure to back up any important files beforehand.
Formatting Your MicroSD Card for Optimal Use
Formatting is a critical step to ensure your microSD card works seamlessly with your Firestick. When you insert a new card, the system will typically guide you through the formatting process with an on-screen prompt. You will have two main format options: Internal Storage or Portable Storage.
Choosing Internal Storage is highly recommended. This option allows the Fire OS to treat the microSD card as an extension of the device’s internal memory. Consequently, apps, games, and their data can be seamlessly moved and run directly from the card, freeing up valuable space on the main system. This is the best choice for improving overall performance and storage capacity.
Selecting Portable Storage is more limited. It only allows you to store media files like photos, videos, and music on the card, not apps or games. For most users looking to expand their Firestick’s capabilities, the Internal Storage option is the clear winner.
Performance Tips for Your Expanded Storage
Simply adding a microSD card isn’t enough; using the right card and managing it properly is key to maintaining performance.
- Choose a High-Speed Card: Not all microSD cards are created equal. For the best experience, especially if you plan to run apps and games from it, select a card with a high speed class. Look for cards labeled A2 (Application Performance Class 2) as they are specifically designed for faster app loading and smoother performance. A UHS-I U3 or V30 card is also a good indicator of high sequential read/write speeds, which benefit video playback.
- Manage Your Installed Apps: After formatting your card as internal storage, you must manually move your existing apps. Navigate to Settings > Applications > Manage Installed Applications. Select an app and choose “Move to SD Card.” This is crucial for freeing up the Firestick’s internal memory, which can help the system run more efficiently.
- Avoid Cheap, No-Name Brands: Investing in a reputable brand like SanDisk, Samsung, or Lexar is advised. These manufacturers offer more reliable products with consistent performance and better warranties, reducing the risk of data corruption or card failure.
By selecting a compatible Firestick model, properly installing and formatting a high-quality microSD card, and actively managing your app storage, you can significantly enhance your device’s capacity and ensure a smooth, responsive streaming experience.
Moving Apps to External Storage
When your Firestick storage fills up, moving apps to external storage becomes essential for maintaining performance. First, connect a compatible USB drive to your Firestick using an OTG cable. Then navigate to Settings > Applications > Manage Installed Applications. Select the app you want to move and choose “Move to USB Storage.”
This process immediately frees up internal storage space while keeping the app fully functional. However, not all apps support this feature—system apps and some streaming applications may remain locked to internal storage. For those stubborn apps, consider clearing cache data as an alternative storage-saving method.
Setting Default Installation Locations
Firestick allows you to set a default installation location for new apps, preventing future storage headaches. Go to Settings > Applications > Appstore and select “External Storage” under the “Automatic Updates” and “App Installation Location” options. This ensures all future downloads automatically install to your connected USB drive.
This setting is particularly valuable when using IPTV services that require significant storage for channel data and recording features. By directing installations to external storage, you maintain optimal internal space for system operations and essential applications.
Optimizing Storage Usage
Effective storage optimization involves multiple strategies beyond simply moving apps. Begin by regularly clearing cache data from streaming applications, which can accumulate several gigabytes over time. Navigate to Settings > Applications > Manage Installed Applications, select each app, and choose “Clear Cache.”
Additionally, uninstall unused applications and review downloaded content. Many users forget about movies or shows downloaded for offline viewing that consume substantial space. For those testing different IPTV free trials, remember to cancel unused subscriptions and remove associated applications promptly.
Advanced Storage Management Techniques
- Use file manager apps to identify and delete redundant files
- Limit automatic video quality settings to reduce cache size
- Monitor storage usage weekly through Settings > My Fire TV > About > Storage
- Consider upgrading to a larger capacity USB drive for extensive app collections
These optimization techniques ensure your Firestick maintains smooth performance, especially when running multiple streaming services or evaluating IPTV providers through extended testing periods. Regular maintenance prevents the sluggish performance that often accompanies nearly-full storage.
External Hard Drives: Portable and Affordable Storage
External hard drives provide a straightforward solution for expanding your device’s storage capacity. These portable devices connect via USB and offer substantial space for media libraries at relatively low costs. Modern external drives typically range from 1TB to 5TB, with some models offering even larger capacities. For example, Western Digital’s My Passport series delivers reliable performance in a compact form factor, while Seagate’s Backup Plus line offers competitive pricing for budget-conscious users.
The primary advantage of external hard drives lies in their plug-and-play simplicity. You can quickly connect them to streaming devices, gaming consoles, or computers without complex setup procedures. However, their performance depends on the connection interface—USB 3.0 and newer USB-C connections provide significantly faster data transfer speeds than older USB 2.0 ports. Consequently, this speed difference directly impacts how quickly you can access stored media files.
Network Attached Storage (NAS): Centralized Media Hub
Network Attached Storage (NAS) systems represent a more advanced storage solution that connects directly to your home network. Unlike external drives that tether to single devices, NAS units make your media library accessible to all connected devices simultaneously. Leading manufacturers like Synology and QNAP offer systems ranging from basic two-bay models to sophisticated multi-drive setups supporting RAID configurations for data redundancy.
The true strength of NAS lies in its centralized management capabilities. You can organize your entire media collection in one location while granting access to family members across various devices. Many modern NAS systems also include built-in media servers like Plex or Emby, which automatically organize your content with metadata and artwork. Moreover, these systems often feature remote access capabilities, allowing you to stream your media while away from home.
Cloud Storage Alternatives: Accessibility and Convenience
Cloud storage services offer a fundamentally different approach to media storage by hosting your files on remote servers. Popular options like Google Drive, Dropbox, and Microsoft OneDrive provide varying amounts of storage space, often with subscription-based pricing for larger capacities. The primary advantage of cloud storage is accessibility—your media becomes available on any internet-connected device without physical storage hardware.
Many streaming devices now integrate directly with cloud storage services, enabling you to play media files stored remotely. However, cloud solutions depend entirely on your internet connection quality and speed. For instance, streaming high-bitrate 4K content from cloud storage requires substantial bandwidth to avoid buffering issues. Additionally, ongoing subscription costs can accumulate over time, potentially making cloud storage more expensive than one-time hardware purchases for large media collections.
Performance Comparison: Speed, Reliability and Cost Analysis
When evaluating storage options, consider these key performance factors:
- Speed: External SSDs offer the fastest data transfer rates (up to 1,000 MB/s), followed by traditional hard drives (80-160 MB/s), with cloud storage speeds dependent entirely on internet connectivity
- Reliability: NAS systems with RAID configurations provide the highest data protection through redundancy, while single external drives carry higher risk of complete data loss if the device fails
- Cost Efficiency: External hard drives deliver the lowest cost per terabyte for one-time purchases, while cloud storage involves recurring subscription fees that may exceed hardware costs over several years
Choosing the Right Storage Solution
Your ideal storage solution depends heavily on your specific needs and usage patterns. For individual users with modest media collections, a simple external hard drive often provides the best balance of cost and convenience. Conversely, households with multiple users and devices typically benefit more from a NAS system’s centralized access and data protection features. Meanwhile, cloud storage excels for users who prioritize accessibility across locations over absolute performance.
Consider your technical comfort level during the selection process. External drives require minimal setup, while NAS systems demand more configuration expertise but offer greater flexibility. Additionally, evaluate your internet connection’s reliability and speed if considering cloud-based options, as these factors directly impact streaming performance. Ultimately, many users implement hybrid approaches, combining local NAS storage for primary media access with cloud backups for important content.
Essential Storage Maintenance Routines
Regular storage maintenance is crucial for keeping your IPTV service running smoothly. First, clear your device’s cache weekly to prevent performance degradation. This removes temporary files that accumulate during normal operation. Additionally, uninstall any unused applications to free up valuable storage space. Many devices have built-in storage management tools in their settings menu that can help identify space-hogs.
For optimal performance, consider performing a monthly system reboot. This clears temporary memory and resolves minor software glitches. Some users find that scheduling automatic restarts during off-hours maintains consistent performance without interrupting viewing sessions. Remember to check your available storage regularly, ensuring you maintain at least 10-15% free space for proper system operation.
Common Error Fixes and Troubleshooting
When encountering playback errors, start by checking your internet connection speed and stability. IPTV services typically require minimum speeds of 10-15 Mbps for HD content. If buffering persists, try switching to a different server within your IPTV application. Many services offer multiple server options to accommodate varying network conditions.
Authentication errors often resolve by simply restarting your streaming device and router. If problems continue, verify your subscription status and ensure your payment is current. For persistent issues, reinstalling the IPTV application can resolve corrupted installation files while preserving your settings and favorites.