Chromecast IPTV Setup Complete Streaming Device Setup Guide
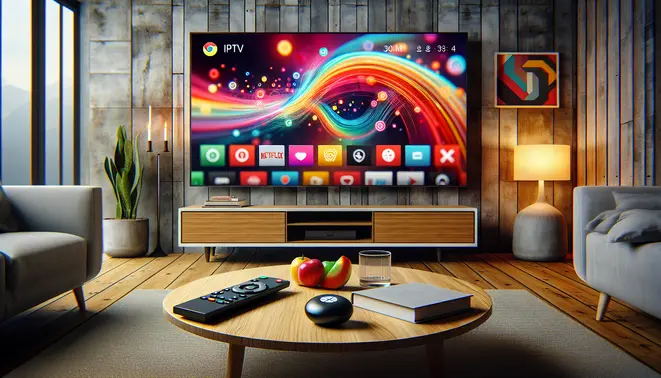
Table of Contents
What is IPTV and How Does It Work with Chromecast?
Internet Protocol Television (IPTV) represents a revolutionary approach to content delivery that streams television programming through internet connections rather than traditional terrestrial, satellite, or cable formats [Source: Streaming Devices Guide]. This technology enables viewers to access live TV channels, video-on-demand content, and time-shifted media through internet protocol networks. When combined with Google’s Chromecast streaming device, IPTV transforms any standard television into a smart entertainment hub capable of accessing thousands of channels and on-demand content from around the world.
The integration process between IPTV services and Chromecast is remarkably straightforward. Most IPTV providers offer dedicated mobile applications or web interfaces that include built-in casting functionality. This allows users to simply select the Chromecast icon within their IPTV app to instantly mirror content to their television screen. Alternatively, users can employ screen mirroring capabilities available on both Android and iOS devices to broadcast their entire device display to the TV.
Essential Equipment for IPTV Streaming with Chromecast
Setting up IPTV with Chromecast requires minimal equipment but careful selection of components to ensure optimal performance. The core requirements include:
- Chromecast Device: Google’s streaming dongle that plugs into your TV’s HDMI port
- Stable Internet Connection: Minimum 15-25 Mbps for HD streaming, with higher speeds recommended for 4K content
- Compatible Smartphone, Tablet, or Computer: Acts as the control device for casting content
- IPTV Subscription: Legal service provider with Chromecast-compatible applications
- Wi-Fi Network: Both Chromecast and control device must connect to the same network
For the best viewing experience, consider investing in a Chromecast with Google TV, which includes a dedicated remote and interface, eliminating the need for constant smartphone use during viewing sessions.
Key Benefits of Combining IPTV with Chromecast
The synergy between IPTV technology and Chromecast delivers numerous advantages that enhance the modern viewing experience. Firstly, it provides exceptional flexibility, allowing users to access content from virtually anywhere with an internet connection. This portability means your favorite shows and live events can travel with you, whether you’re moving between rooms at home or visiting friends and family.
Cost efficiency represents another significant benefit. Traditional cable subscriptions often include numerous channels that viewers never watch, while IPTV services typically offer more tailored package options. Consequently, users pay only for content they actually consume, potentially saving hundreds of dollars annually compared to conventional cable packages.
Content variety stands out as perhaps the most compelling advantage. IPTV services frequently provide access to international channels, niche programming, and specialized content that rarely appears on mainstream cable lineups. This global accessibility enables viewers to explore diverse cultural programming, international sports events, and specialized entertainment options previously unavailable through traditional providers.
Legal Considerations for IPTV Streaming Services
Navigating the legal landscape of IPTV services requires careful attention to provider legitimacy and content licensing. Legitimate IPTV services obtain proper licensing agreements with content creators and distributors, ensuring that both providers and consumers operate within legal boundaries. Unfortunately, the market also contains numerous unlicensed services that stream copyrighted content without proper authorization, potentially exposing users to legal consequences.
To identify legitimate IPTV providers, look for transparent business practices including clear terms of service, privacy policies, and customer support channels. Reputable services typically offer free trial periods that allow potential subscribers to evaluate service quality and content selection before committing to paid subscriptions. Additionally, legitimate providers usually maintain professional websites with contact information and company registration details.
When selecting an IPTV service, prioritize providers that explicitly state their compliance with copyright laws and content distribution regulations. Our comprehensive IPTV subscription guide offers detailed information about evaluating provider legitimacy and understanding the legal framework surrounding internet television services.
Geographical restrictions represent another important legal consideration. Many content licensing agreements include regional limitations, meaning certain programming may only be available in specific countries. While some IPTV services attempt to circumvent these restrictions, doing so may violate terms of service and potentially breach copyright laws in certain jurisdictions.
Unboxing and Setting Up Your Chromecast
Begin by carefully opening the Chromecast packaging. Inside, you’ll find the Chromecast device itself, which resembles a small circular or oval disc depending on your model. Additionally, the package includes a USB power cable and a power adapter. Some models also come with an HDMI extender cable, which is particularly useful if your TV’s HDMI ports are difficult to access. Ensure all components are present before proceeding to the next step.
Connecting Chromecast to Your TV
Locate an available HDMI port on your television and plug the Chromecast device directly into it. If the space is tight, connect the HDMI extender cable to your Chromecast first, then plug the other end into the TV’s HDMI port. Next, connect the USB power cable to your Chromecast and plug the other end into the included power adapter, which should then be connected to a wall outlet. For optimal performance, Google recommends using the provided power adapter rather than your TV’s USB port.
Switch your TV to the corresponding HDMI input using your remote control. You should see the Chromecast setup screen appear, indicating the device is receiving power and properly connected.
Connecting to Wi-Fi and Completing Setup
Now it’s time to connect your Chromecast to your home network. First, download the Google Home app on your smartphone or tablet from the Google Play Store or Apple App Store. Ensure your mobile device is connected to the same Wi-Fi network you plan to use for Chromecast.
Open the Google Home app and follow these steps:
- Tap the “+” icon to add a new device
- Select “Set up device” followed by “New device”
- The app will search for and identify your Chromecast
- When a code appears on your TV screen, verify it matches the code in the app
- Choose your preferred language for the interface
- Select your Wi-Fi network and enter the password
- Wait for the connection to establish
- Customize your device name and room location
After completing these steps, your Chromecast will finalize the setup process, which may include downloading any available updates. Meanwhile, you might want to explore our complete guide to IPTV subscriptions to maximize your streaming options.
Finalizing Setup and Additional Features
Once connected, your Chromecast is ready to use. The Google Home app allows you to customize various settings, including ambient mode displays when the device is idle. You can cast content from compatible apps by tapping the Cast icon, which looks like a rectangle with Wi-Fi waves in the corner.
For enhanced streaming capabilities, consider exploring IPTV free trials to access live television content through your new Chromecast. Additionally, many users find value in understanding how to choose the right IPTV subscription for their viewing preferences.
Remember that you can always return to the Google Home app to modify settings, check for updates, or troubleshoot connection issues. Your Chromecast should now be fully operational and ready to transform your television into a smart streaming hub.
Top Chromecast-Compatible IPTV Apps
Several IPTV applications work seamlessly with Chromecast, allowing you to stream live television and on-demand content directly to your TV. These apps transform your mobile device into a powerful remote control for your entertainment system.
GSE Smart IPTV
GSE Smart IPTV stands out as one of the most versatile options for Chromecast users. This Android and iOS application supports multiple playlist formats including M3U, XSPF, and JSON. Moreover, it features built-in Chromecast functionality, making streaming to your television straightforward. The app also includes an electronic program guide (EPG) for easy content navigation and parental controls for family-friendly viewing.
IPTV Smarters Pro
IPTV Smarters Pro offers a polished interface and reliable Chromecast support across both mobile and tablet devices. This popular app works with most IPTV services using Xtream Codes API, making setup particularly straightforward. Its user-friendly design organizes content logically, while features like catch-up TV and VOD (Video on Demand) enhance the viewing experience.
OTT Navigator
OTT Navigator provides advanced users with extensive customization options alongside solid Chromecast compatibility. The application supports multiple IPTV services simultaneously and allows detailed interface personalization. While its learning curve is steeper than other options, the flexibility it offers makes it worth considering for power users.
Installation and Setup Process
Begin by installing your chosen IPTV app from the official Google Play Store or Apple App Store. Always download from official sources to avoid security risks associated with third-party app stores. Most quality IPTV apps are free to download, though some may offer premium features through in-app purchases.
Ensure your mobile device and Chromecast are connected to the same Wi-Fi network. Open your IPTV application and look for the Cast icon (typically appearing as a rectangle with Wi-Fi waves in the corner). Tap this icon and select your Chromecast device from the list. The interface should now appear on your television screen.
You’ll need to input your IPTV service details within the application. This typically involves entering your provider’s portal URL, username, and password. Alternatively, many apps accept M3U playlist links provided by your IPTV subscription service. The exact process varies by application, but most include straightforward setup wizards to guide you through configuration.
Account Configuration Tips
Your viewing experience heavily depends on selecting a trustworthy IPTV provider. Look for services offering stable streams, comprehensive channel lineups, and reliable customer support. Many providers offer free IPTV trials that let you test their service before committing to a subscription.
Most IPTV applications include settings to optimize video playback. Consider adjusting the video decoder based on your device’s capabilities and network conditions. If you experience buffering, try switching between hardware and software decoders. Additionally, enabling the “Time Shift” or “Catch-up” feature when available lets you watch previously aired content.
If you encounter connection problems, first verify that both devices share the same network. Restarting your router, Chromecast, and mobile device often resolves temporary glitches. For persistent issues, check if your IPTV provider has specific recommendations for Chromecast compatibility. Some services work better with particular applications, so experimenting with different apps might improve performance.
Remember that using IPTV services to access copyrighted content without proper licensing may violate terms of service and local laws. Always ensure you have appropriate rights to view the content through your chosen provider.
Configuring M3U Playlists and EPG
M3U playlists serve as the foundation for your IPTV viewing experience, containing all the channel URLs and metadata needed for playback. Most IPTV players support M3U format, making setup relatively straightforward. Begin by obtaining your M3U playlist URL from your IPTV provider, which typically looks like a web address ending with “.m3u” or containing playlist parameters.
To add your playlist, navigate to your IPTV player’s settings or playlist management section. Look for options labeled “Add URL,” “Playlist URL,” or “M3U URL.” Paste your complete playlist URL into this field and save the changes. Some players may require you to manually refresh the playlist to load the channels. Alternatively, if you’ve downloaded an M3U file, use the “Import from file” option to upload it directly from your device storage.
Configuring Channel Lists for Easy Navigation
Once your M3U playlist loads, you’ll likely see hundreds or even thousands of channels. Effective organization is crucial for finding content quickly. Most IPTV players allow you to create favorite lists, hide unwanted channels, and sort channels by category. Start by removing channels you never watch to declutter your interface—this significantly improves navigation speed.
Create custom groups based on your viewing preferences, such as sports, news, movies, or international channels. Many players support EPG (Electronic Program Guide) integration, which automatically categorizes channels when properly configured. Consider organizing channels by language or region if you watch international content regularly. Regularly update your channel lists as providers sometimes change channel lineups or add new content.
Setting Up Electronic Program Guides (EPG)
An Electronic Program Guide transforms your IPTV experience from basic channel surfing to a comprehensive television platform. EPG provides detailed program information, including show descriptions, air times, and duration. To set up EPG, you’ll need an EPG source URL from your IPTV provider, which typically looks similar to your M3U playlist URL but may end with “.xml” or contain EPG parameters.
In your IPTV player’s settings, locate the EPG or program guide section. Paste your EPG URL in the designated field and save the configuration. Some players require you to manually download the EPG data initially, while others automatically update it periodically. Ensure your player’s timezone settings match your location for accurate program scheduling.
Optimizing EPG Performance and Reliability
For optimal EPG performance, regularly update your guide data—most players offer automatic update options ranging from every few hours to daily. If you experience missing program information, try alternative EPG sources, as some providers offer multiple URLs. Many players allow you to assign custom EPG sources to specific channels, which is particularly useful for regional or specialty content that might not be covered by your primary EPG source.
Consider using third-party EPG services if your provider’s guide is incomplete or unreliable. These services often offer more comprehensive data and better reliability. However, ensure compatibility with your player and check if additional configuration is needed for proper channel-to-program mapping. Proper EPG setup not only enhances your viewing experience but also enables features like program recording and reminders.
Troubleshooting Common Playlist and EPG Issues
If channels fail to load after adding your M3U playlist, first verify your playlist URL is correct and accessible. Test the URL in a web browser—if it downloads an M3U file, the URL is valid. Connection issues might indicate server problems with your IPTV provider, or your subscription may need renewal. For EPG problems, ensure your EPG URL is correct and contains data in a compatible format.
Sometimes, channel and EPG mapping fails, resulting in programs showing incorrect information. Most players include tools to manually match channels with their corresponding EPG data. Look for “EPG mapping” or “channel assignment” options in your player’s settings. If using multiple playlists, ensure they’re properly organized and not conflicting with each other. Regular maintenance of your playlists and EPG sources ensures consistent performance and access to your preferred content.
For those exploring IPTV options, our guide to IPTV free trials can help you test different services before committing to a subscription. Meanwhile, proper playlist and EPG configuration remains essential regardless of which service you choose, as it directly impacts your daily viewing experience and content discovery.