HDMI No Signal Fix A Complete Streaming Device Setup Guide

Table of Contents
Understanding the HDMI “No Signal” Nightmare
That dreaded “No Signal” message on your screen means your display device—such as a TV or monitor—is powered on and functioning, but it is not receiving any usable video data from the source device connected via the HDMI cable. Essentially, the communication pathway between your streaming device, gaming console, or computer and your screen has been interrupted or failed to establish properly.
The Digital Handshake: Why HDMI Connections Fail
At the heart of most HDMI issues is a process called the HDMI handshake. This is a digital authentication protocol where the source device (like a Fire Stick) and the display (your TV) exchange information about their capabilities. They agree on a compatible resolution, color format, and audio setup before any content is transmitted.
When this handshake fails, the TV receives no valid data stream, resulting in a black screen and the “No Signal” error. This failure can be triggered by a faulty cable, an incompatible HDCP (High-bandwidth Digital Content Protection) version, a glitch in one of the devices, or a loose connection.
Common Physical Causes of Signal Loss
Often, the problem is not a complex software issue but a simple physical one. A loose HDMI cable is one of the most frequent culprits. Even a slightly unplugged cable can break the connection. Furthermore, HDMI ports can become damaged over time from repeated plugging and unplugging, or the cable itself can be faulty internally, leading to intermittent signal loss.
It’s also worth checking if you’ve selected the correct input source on your TV. Modern TVs have multiple HDMI ports, and it’s easy to accidentally have the TV set to HDMI 2 when your device is plugged into HDMI 1.
HDCP: The Invisible Content Protection Barrier
High-bandwidth Digital Content Protection (HDCP) is a form of digital copy protection. It’s designed to prevent the unauthorized recording of copyrighted audio and video content as it travels across the HDMI connection. Both your source device and your display must support the same version of HDCP for protected content to play.
If you’re trying to watch a 4K movie from a streaming service on our recommended 4K IPTV service, but your TV only supports an older HDCP version, the handshake will fail, and you will see “No Signal.” This is a common issue when connecting new devices to older televisions.
Power and Software Glitches
Sometimes, the issue is not with the connection but with the devices themselves. A streaming stick that hasn’t been fully powered can fail to initiate the HDMI handshake. Similarly, a software bug or a crashed application on the source device can prevent it from outputting a signal.
In many cases, a simple power cycle—turning both the TV and the source device completely off and then on again—can resolve these temporary glitches by forcing a fresh handshake. For more persistent problems, exploring a different service via a free trial can help you determine if the issue is with your specific app or a broader hardware compatibility problem.
The Essential Pre-Setup Checklist
Gather Your Core Equipment
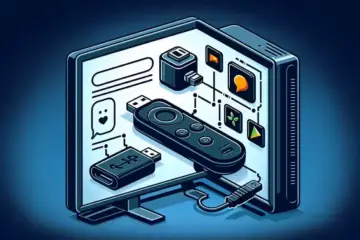
Before you even touch an HDMI cable, ensure you have all the necessary components ready. You will need your streaming device (such as a Roku, Amazon Fire Stick, or Apple TV), the correct power adapter, a high-speed HDMI cable, and a stable Wi-Fi network name and password. Additionally, have your TV’s remote control on hand for input switching. Forgetting a single item, like the proprietary power adapter, is a common reason a device fails to power on and signal the TV.
Verify Your TV’s HDMI Ports and Input Selection
Modern TVs often have multiple HDMI ports. First, identify which port you are using—HDMI 1, HDMI 2, etc. It is critical to ensure your TV is set to the correct HDMI input source. Use your TV remote to cycle through the available inputs until you see the streaming device’s interface. If you have an older TV, confirm that its HDMI ports are fully functional, as they can degrade over time. Meanwhile, some devices work best when plugged into specific, high-bandwidth ports labeled “HDMI ARC” or “HDMI 2.0.”
Inspect and Upgrade Your HDMI Cable
A faulty or low-quality HDMI cable is a primary culprit for “No Signal” errors. Examine your cable for any visible physical damage, such as bent pins or fraying. For 4K streaming devices, you must use a high-speed HDMI cable that supports the necessary bandwidth. If your cable is several years old, consider replacing it with a certified High-Speed HDMI or Ultra High-Speed HDMI cable to eliminate this variable. This simple swap often resolves the issue immediately.
Ensure a Stable Power Supply
Streaming devices require consistent and adequate power. Never power your device solely from your TV’s USB port, as these often cannot supply enough current, leading to intermittent operation. Instead, always plug the device’s power adapter directly into a wall outlet. Furthermore, check that all power connections are secure at both the outlet and the device. A loose power connection can cause the device to reset constantly, preventing a stable signal from being established.
Prepare Your Network and Accounts
Since most setup processes require an internet connection, have your Wi-Fi network name and password readily available. For a smoother experience, consider using an Ethernet adapter if your streaming device and router support it. Also, ensure you have the login credentials for your streaming service accounts. If you’re exploring new options, our complete IPTV subscription guide can help you choose a reliable service. For instance, you can even test services with an IPTV free trial before committing.
Update Everything Before You Start
Finally, a proactive step is to ensure all your equipment has the latest software. If possible, connect your smart TV to the internet and check for any pending firmware updates, as these can improve HDMI handshake compatibility. Similarly, your streaming device will typically update itself during the initial setup, but a stable internet connection is vital for this process. Taking these steps before you begin the physical connection can prevent many common setup headaches and ensure a seamless entertainment experience from the moment you press power.
Cable & Connection Troubleshooting
Check Your Physical Connections
A loose HDMI cable is one of the most frequent culprits behind a “no signal” error. Over time, cables can work themselves loose from ports due to movement, cleaning, or accidental tugs. First, ensure the HDMI cable is firmly seated in both your streaming device and your television. You should feel a gentle click when it’s properly inserted. Additionally, verify you’ve connected the cable to the correct HDMI port on your TV, as many modern sets have multiple inputs. Try switching to a different HDMI port on your television to rule out a faulty input. For a deeper understanding of setting up your entertainment system, explore our guide on choosing the right 4K IPTV subscription.
Inspect for Cable and Port Damage
Physical damage is another common source of failure. Carefully examine the entire length of your HDMI cable for any visible signs of wear, such as fraying, kinks, or bent connectors. The metal connectors on the ends of the cable are particularly fragile and can easily become bent or broken. Similarly, inspect the HDMI ports on both your TV and streaming device for any debris, bent pins, or signs of damage. A can of compressed air can be used to gently blow out any dust that might be obstructing the connection. If you suspect a faulty cable, the simplest solution is to swap it with a known working one to test.
Secure Your Setup for a Stable Signal
Beyond a simple loose connection, the overall stability of your setup can impact performance. An overly tight cable bend right at the connector can strain the internal wires and lead to intermittent signal loss. Ensure your cables have a gentle, natural curve. Furthermore, if you are using any HDMI couplers, splitters, or switches, these can sometimes be the point of failure. Try connecting your streaming device directly to the TV to see if the signal is restored. This process of elimination helps isolate the problem component. For those exploring new streaming options, starting with an IPTV free trial is a great way to test services without commitment.
When to Consider a Cable Upgrade
Not all HDMI cables are created equal. An older or low-quality cable might not support the bandwidth required for higher resolutions like 4K or HDR content from modern streaming services. If you’ve recently upgraded your TV or subscription and are now experiencing issues, your cable could be the bottleneck. For standard 4K streaming, a High-Speed HDMI cable is typically sufficient. However, for advanced features like 4K at 120Hz or 8K, you may need an Ultra High-Speed HDMI cable [Source: HDMI.org]. Investing in a certified, high-quality cable can resolve compatibility issues and ensure a reliable connection for your premium IPTV subscription.
TV & Display Settings Demystified
Understanding HDMI-CEC: The Hidden Control Feature
HDMI-CEC (Consumer Electronics Control) is a powerful feature that allows devices connected via HDMI to control each other. For example, turning on your streaming device can automatically switch your TV to the correct input and power it on. However, this feature is a common culprit behind “no signal” messages. If enabled incorrectly, it can cause devices to fight for control, leading to a blank screen.
Different manufacturers use various names for this feature, such as Anynet+ (Samsung), SimpLink (LG), or Bravia Sync (Sony). If you’re experiencing signal loss, a simple first step is to navigate to your TV’s settings menu, find the CEC function, and temporarily disable it. You can then test your connection. Re-enabling it one device at a time can help you identify if a specific gadget is causing the conflict. [Source: Lifewire]
Mastering Input Selection and Source Switching
A surprisingly frequent reason for a “no signal” error is that the TV is set to the wrong input source. Modern televisions often have multiple HDMI ports, along with component, composite, and antenna inputs. Your TV will not automatically detect a signal if it’s looking for it on HDMI 2 while your device is plugged into HDMI 3.
To resolve this, locate the “Input,” “Source,” or a similarly labeled button on your TV remote. Cycle through the available options until you find the correct one corresponding to your streaming device or cable box. For a more permanent solution, many TVs allow you to rename inputs in the settings menu (e.g., “Apple TV” or “PlayStation”). This makes future source selection much more straightforward and helps avoid confusion. [Source: CNET]
Optimizing Resolution and Refresh Rate Settings
Mismatched resolution and refresh rate settings between your streaming device and your TV can also lead to a blank screen or an “unsupported signal” message. For instance, if your device is outputting a 4K signal but your older TV only supports 1080p, you may encounter issues. Conversely, some TVs struggle with specific refresh rates from external devices.
To fix this, you may need to adjust the display settings on your source device. If you can’t see the screen, try connecting the device to a different display that you know is compatible to lower the resolution. Then, reconnect it to your primary TV. Aim for the highest resolution your TV supports, which is often detailed in its manual or specifications online. For the best streaming experience, ensure your setup can handle the demands of a high-quality 4K IPTV subscription.
Performing a Power Cycle and Checking Cables
Before delving deeper into complex settings, always perform a complete power cycle. This clears temporary glitches in the devices’ memory that can cause handshake failures. To do this properly, unplug both your TV and the source device from the wall outlet. Wait for at least 60 seconds before plugging them back in and turning them on. This simple step resolves a significant number of HDMI-related problems.
Meanwhile, physically inspect your HDMI cable. Ensure it is firmly seated in the ports on both the TV and the device. A loose connection is a common, easily overlooked cause of signal loss. If possible, try a different HDMI cable, preferably a “High-Speed” certified one, to rule out a faulty wire. Damaged or low-quality cables cannot reliably transmit the high-bandwidth data required for modern HD and 4K video. [Source: Tom’s Guide]
Advanced Troubleshooting: Factory Resets and Firmware
If the basic steps fail, more advanced solutions may be necessary. A factory reset on your TV or streaming device will restore all settings to their original defaults, eliminating any problematic custom configurations. Be aware that this will erase all your personal preferences, so it should be used as a last resort.
Furthermore, check for firmware updates for both your TV and your connected devices. Manufacturers frequently release updates that fix bugs and improve compatibility with other hardware. You can usually find the update option in the “System,” “Support,” or “About” section of your device’s settings menu. Keeping your software current is a key part of maintaining a stable home entertainment system, especially when using various IPTV subscription services.
Streaming Device-Specific Solutions
Roku HDMI No Signal Fixes
Roku users encountering an HDMI no signal error should first perform a simple power cycle. Unplug your Roku device and television from their power sources for at least 30 seconds before reconnecting them. This basic reset often resolves temporary communication issues between devices. Additionally, check your Roku’s display type settings by pressing the Home button on your remote, navigating to Settings > Display type, and ensuring it matches your TV’s maximum supported resolution.
For persistent problems, try using a different HDMI port on your television. Some Roku models may experience compatibility issues with specific HDMI inputs, particularly those labeled for ARC/eARC functionality. If the issue continues, test your HDMI cable with another device to rule out cable failure. Roku’s official support documentation recommends using certified high-speed HDMI cables for optimal performance, especially with 4K streaming.
Amazon Fire TV Troubleshooting
Fire TV devices require specific troubleshooting approaches when facing HDMI connectivity problems. Begin by holding the Select and Play/Pause buttons simultaneously for 10 seconds to force a display reset. This triggers the device to renegotiate the HDMI handshake with your television. If this doesn’t work, access your Fire TV through the accompanying mobile app if available, then navigate to Display & Sounds > Display to adjust resolution settings manually.
Amazon suggests checking for software updates even without video output by using voice commands through your Alexa remote. Simply say “Check for updates” to initiate the process. For Fire TV Stick models, ensure the device is directly connected to the TV’s HDMI port rather than through extensions or adapters, which can cause signal degradation. The power adapter should be the original one provided, as insufficient power can lead to HDMI output issues.