The Ultimate Guide To Expanding Your Firestick Storage
Why Firestick Storage Matters
Every Firestick comes with a fixed amount of internal storage, typically ranging from 8GB to 16GB depending on the model. While this might seem sufficient initially, the operating system and pre-installed apps consume a significant portion, leaving you with limited space for your favorite streaming applications, games, and downloaded content. When this available space dwindles, your device’s performance can suffer dramatically [Source: Streaming Devices Guide].
The Direct Impact of Low Storage on Performance
Running out of storage space on your Firestick isn’t just an inconvenience—it actively hampers your streaming experience. As storage fills up, the device struggles to allocate temporary files and cache data efficiently. This can lead to noticeable app lag, longer loading times, and even unexpected crashes during your favorite shows or movies. Furthermore, system updates may fail to install properly if there isn’t enough free space, potentially leaving your device vulnerable to security issues.
In addition to performance issues, limited storage restricts your ability to install new apps or games. You might find yourself constantly managing your storage by deleting one app to make room for another, which becomes frustrating over time. This is particularly relevant if you use multiple streaming services or enjoy experimenting with different applications to enhance your entertainment setup.
How Expanding Storage Transforms Your Experience
Fortunately, expanding your Firestick’s storage is both simple and transformative. By adding a compatible USB drive or microSD card (depending on your model), you can significantly increase your available space. This upgrade allows you to install more applications without worrying about constant storage management. Moreover, it provides room for larger game files and downloadable content that would otherwise be impossible to store.
Expanded storage also improves overall system performance by giving your Firestick ample room to operate efficiently. With more available space, the device can manage cache files and temporary data without compromising speed or stability. Consequently, you’ll experience smoother navigation, faster app launches, and more reliable streaming sessions. This enhancement is especially valuable if you use IPTV services that require substantial cache space for optimal performance [Source: Streaming Devices Guide].
Practical Benefits Beyond Basic Streaming
Beyond improving core streaming functions, expanded storage unlocks additional possibilities for your Firestick. You can download movies and TV shows for offline viewing during travel or internet outages. Similarly, it enables you to explore a wider range of applications beyond basic streaming, including productivity tools, educational apps, and more sophisticated games that require significant storage space.
Additionally, having ample storage ensures that your device remains future-proof as applications continue to grow in size and complexity. Newer versions of popular streaming apps often require more space than their predecessors, making expanded storage a wise long-term investment. This forward-thinking approach means you won’t need to upgrade your entire device simply because you’ve run out of storage capacity.
Ultimately, understanding and addressing your Firestick’s storage limitations is key to maintaining an optimal streaming experience. By recognizing the importance of available space and taking steps to expand it when necessary, you ensure that your device continues to deliver the seamless entertainment you expect.
Assessing Your Current Storage Situation
Before you can effectively manage your Firestick storage, you need to know exactly how much space you have left. Fortunately, Amazon makes this process straightforward. Navigate to Settings > My Fire TV > About > Storage to view a clear breakdown of your total storage capacity and how much remains available. This dashboard provides an immediate snapshot of your current situation, showing both used and free space in gigabytes.
For a more detailed analysis, consider installing a dedicated storage analyzer app from the Amazon Appstore. Applications like those recommended by Analytics Insight can give you a visual representation of your storage allocation, making it easier to identify which categories of data are consuming the most space. Regularly monitoring this information helps you stay ahead of potential storage issues before they impact your streaming experience.
Identifying Storage-Hungry Applications
Your installed applications are often the primary culprits behind dwindling storage space. To see exactly which apps are using the most room, go to Settings > Applications > Manage Installed Applications. Here, you’ll find a comprehensive list sorted by storage usage. Streaming apps, in particular, can accumulate significant cache data over time. For instance, Netflix, Hulu, and Disney+ can each store several gigabytes of temporary files to improve loading times.
When reviewing this list, pay special attention to apps you no longer use. Furthermore, some IPTV services and their associated apps can consume substantial storage, especially if they cache channel data or store downloaded content. If you’re exploring different streaming options, our guide to the best IPTV subscriptions can help you choose services that balance features with efficient storage usage.
Pinpointing Large Files and Cached Data
Beyond applications, cached data and downloaded files can silently consume valuable storage space. The Firestick automatically caches information from streaming services to enhance performance, but this data isn’t always efficiently managed. To clear this cached data, navigate to Settings > Applications > Manage Installed Applications, select any app, and choose “Clear cache.” This action removes temporary files without affecting your login information or preferences.
Meanwhile, if you’ve downloaded movies or shows for offline viewing through services like Prime Video, these files can occupy significant space. Check your downloads folder regularly and remove content you’ve already watched. According to TechHive, a single HD movie download can consume 2-4GB of storage, while 4K content requires even more space. Therefore, managing these downloads is crucial for maintaining adequate free storage.
Using Storage Management Tools Effectively
Amazon provides built-in tools to help you manage storage more proactively. The “Internal Storage” section not only shows what’s using space but also offers recommendations for freeing it up. For example, the system might suggest removing unused applications or clearing cache for specific apps that have accumulated large amounts of temporary data.
Additionally, consider using external storage solutions if you frequently encounter space limitations. The Firestick supports USB OTG adapters and microSD cards (on compatible models), allowing you to expand your available storage significantly. This approach is particularly useful if you use multiple streaming services or enjoy downloading content for offline viewing.
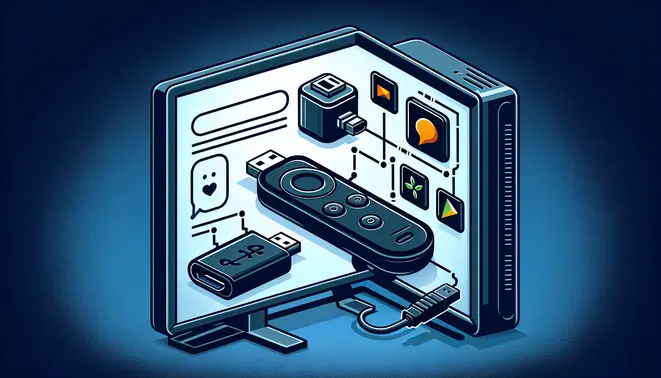
USB OTG Method – The Most Popular Solution
The USB On-The-Go (OTG) method has become the go-to solution for Firestick users needing additional storage space. This approach allows you to connect USB flash drives, external hard drives, and other storage devices directly to your Firestick using a simple adapter cable. Consequently, you can significantly expand your device’s capacity for apps, games, and media files without complicated modifications.
Required Equipment
Before beginning, you’ll need specific hardware components. First, ensure you have a compatible USB storage device—either a flash drive or external hard drive with sufficient capacity. Second, you’ll need a USB OTG adapter cable that connects to your Firestick’s micro-USB port. Additionally, consider the power requirements; some setups may benefit from an OTG cable with an extra power input to ensure stable operation.
Step-by-Step Setup Process
Begin by connecting your USB storage device to the OTG adapter. Next, plug the OTG adapter into your Firestick’s micro-USB port while keeping the device powered off. Then, connect the power adapter to the OTG cable’s additional power port if available, or directly to your Firestick. Finally, power on your Firestick and wait for the system to recognize the new storage.
Once your Firestick boots up, navigate to Settings > My Fire TV > About > Storage to verify that the system detects your USB device. If the drive isn’t recognized, try reformatting it to FAT32 or exFAT format using a computer, as these file systems typically offer the best compatibility with Firestick devices [Source: How-To Geek].
Configuring Storage Settings
After successful detection, you’ll need to configure how your Firestick uses the additional storage. Access Settings > Applications > Manage Installed Applications to move existing apps to the USB storage. Alternatively, set the USB drive as the default installation location for new applications through Developer Options. This optimization ensures your Firestick’s internal storage remains available for system operations while maximizing your expanded capacity.
Troubleshooting Common Issues
Some users encounter challenges during setup that are easily resolved. If your USB device isn’t recognized, check that it’s properly formatted and doesn’t exceed the Firestick’s supported capacity limits. Meanwhile, if you experience performance issues or disconnections, verify that your power supply provides adequate amperage—at least 2A is recommended for stable operation with external storage [Source: Amazon Fire TV Support]. Additionally, ensure your OTG cable is fully compatible with your specific Firestick model.
Advantages of USB OTG Expansion
This method offers several significant benefits compared to other storage solutions. First, it provides substantial storage expansion at a relatively low cost. Second, setup is straightforward without requiring technical expertise. Moreover, USB OTG maintains the portability of your Firestick setup while offering flexibility to use different storage devices as needed.
MicroSD Card Expansion (For Compatible Models)
Which Firestick Models Support MicroSD Card Expansion?
Not all Amazon Fire TV devices support expandable storage, so it’s crucial to verify compatibility before purchasing a MicroSD card. The Fire TV Stick 4K Max (1st and 2nd Gen) and the Fire TV Stick 4K (1st and 2nd Gen) both feature a MicroSD card slot for storage expansion. However, earlier models like the basic Fire TV Stick (3rd Gen) and the Fire TV Stick Lite do not have this capability.
To confirm your device supports it, look for a small, covered slot on the side of the Firestick, typically opposite the HDMI connector and power port. For a definitive check, you can also navigate to Settings > My Fire TV > About on your device to see the exact model name. This simple verification ensures you don’t buy hardware you can’t use.
Choosing the Right MicroSD Card for Your Firestick
Selecting the appropriate MicroSD card is essential for optimal performance. Amazon officially supports cards up to 128GB, but many users report success with 256GB and even 512GB cards, though these larger capacities may require formatting to a compatible file system like FAT32. For smooth operation, choose a card with a Class 10 rating or, better yet, a UHS Speed Class 1 (U1) or higher.
These speed classes ensure the card can handle high-definition video streaming and app data without buffering or lag. While you don’t necessarily need the most expensive card, avoid generic, no-name brands. Instead, opt for reliable manufacturers like SanDisk, Samsung, or Lexar. A quality card prevents data corruption and provides a stable experience for storing apps, games, and media.
Step-by-Step: Installing and Formatting Your MicroSD Card
The installation process is straightforward. First, power off your Fire TV Stick by unplugging it from its power source. Next, locate the MicroSD card slot cover on the side of the device. Gently open the cover and insert the MicroSD card with the metal contacts facing down and the notched edge facing away from the Firestick. Push it in until it clicks into place.
Once the card is physically installed, plug your Firestick back in. Turn on your TV and switch to the correct HDMI input. Your Fire TV will automatically detect the new storage. A prompt will appear asking if you want to format the card. Confirm this action. The system will format the card as “internal storage,” which allows you to move apps and games to it, or as “portable storage,” which is better for media files like photos and videos.
For most users, formatting as internal storage is the best choice to genuinely expand the available space for applications. The formatting process only takes a minute. After it completes, you can manage your new storage from Settings > Applications > Manage Installed Applications to move apps over.
Managing Your Expanded Firestick Storage
With your MicroSD card successfully installed and formatted, you can now take full control of your device’s storage. Navigate to Settings > Applications > Manage Installed Applications to see a list of all your apps. Select any app, and you will see an option to “Move to SD Card.” This action frees up valuable internal storage, which can help improve overall system performance.
It’s important to note that not every app can be moved to external storage, as this is a decision made by the app developer. However, for compatible apps, this is an excellent way to manage space. Furthermore, if you formatted the card as portable storage, you can use it to store your personal media library, making it easy to play your own videos and music directly through the Fire TV interface.
Network Storage Options
Network-attached storage (NAS) provides a powerful solution for expanding your Firestick’s media capabilities beyond local storage limitations. These dedicated file storage devices connect directly to your home network, creating a centralized media library accessible by all your streaming devices. This approach eliminates the need for individual external drives on each device while offering significantly more storage capacity than typical USB expansions.
Choosing the Right NAS Device
When selecting a NAS for Firestick streaming, consider both capacity and performance requirements. For standard HD content, a single-bay NAS with 4-8TB storage suffices for most users. However, for 4K streaming libraries, consider multi-bay models with RAID configurations for both increased capacity and data protection. Leading manufacturers like Synology and QNAP offer user-friendly solutions specifically designed for media streaming applications.
Network speed represents another critical consideration. While most modern NAS devices support Gigabit Ethernet, ensure your router and network infrastructure can handle high-bitrate 4K streams without buffering. For optimal performance, connect your NAS directly to your router via Ethernet rather than relying on Wi-Fi connectivity.
Setting Up Your NAS for Firestick
Configuration begins with physically connecting your NAS to your network and running the initial setup through the manufacturer’s web interface. Create dedicated shared folders for your media content—separate directories for movies, TV shows, music, and photos help maintain organization. Most modern NAS systems include media server applications like Plex Media Server or Emby, which automatically organize and stream your content with rich metadata.
For direct file access without media server software, enable SMB (Server Message Block) or NFS (Network File System) protocols on your NAS. These protocols allow file explorers on your Firestick to browse network shares directly. Popular Firestick apps like VLC Media Player and Kodi can access network shares through these protocols for straightforward media playback.
Connecting Firestick to Network Storage
Several methods exist for accessing NAS content on your Firestick. The most seamless approach involves installing media center applications like Plex or Kodi, which automatically detect and index content from your NAS. Alternatively, file manager apps such as ES File Explorer or X-plore File Manager can mount network shares directly using SMB credentials.
For users with existing media libraries, the Plex Media Server approach often proves most user-friendly. After installing Plex Server on your NAS and the Plex client on your Firestick, your entire media collection becomes available through an intuitive interface similar to commercial streaming services. This method automatically fetches artwork, descriptions, and metadata while supporting transcoding for compatible formats.
Advanced Network Storage Considerations
Beyond basic setup, several advanced configurations enhance the streaming experience. Implementing quality of service (QoS) settings on your router prioritizes streaming traffic, ensuring smooth playback even during network congestion. Additionally, setting up remote access enables streaming your media library outside your home network—perfect for travel or mobile viewing.
Storage expansion represents another advantage of NAS solutions. As your media collection grows, most multi-bay NAS devices support adding additional drives or replacing existing drives with higher capacity models without downtime. Some systems even support SSD caching for frequently accessed content, further improving streaming performance.
Security shouldn’t be overlooked when implementing network storage. Enable encryption on sensitive shares, use strong passwords, and regularly update your NAS firmware to protect against vulnerabilities. Many modern NAS systems offer automated backup solutions, providing peace of mind for your valuable media collections.
Advanced Storage Management Techniques
Once you’ve expanded your Firestick storage, implementing professional management techniques becomes essential for maintaining optimal performance. Advanced storage management goes beyond basic cleanup, focusing on systematic approaches to data optimization, cache control, and download management that ensure your device runs smoothly even with extensive media libraries and applications.
Strategic App Data Optimization
Begin by auditing your installed applications through Settings > Applications > Manage Installed Applications. Sort apps by size to identify the largest storage consumers. For streaming apps like Netflix or Hulu, clear temporary data regularly while preserving login credentials. However, be cautious with apps that store important data locally, as clearing data may reset preferences and downloaded content.