Android TV Setup Complete Streaming Device Setup Guide
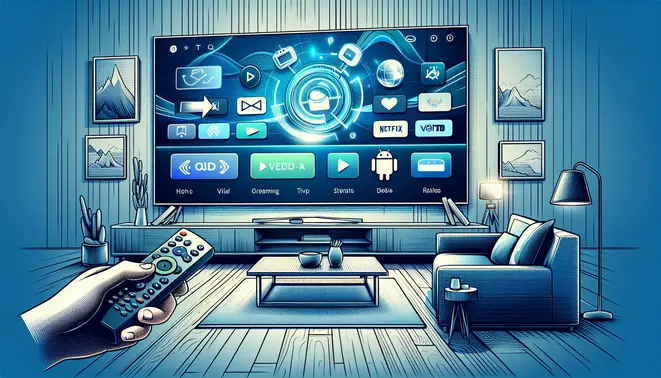
Table of Contents
What’s Inside Your Android TV Box Package?
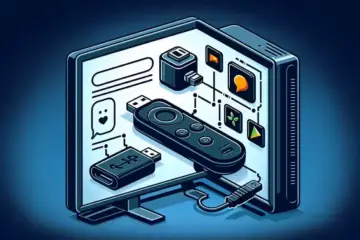
When you unbox your new Android TV device, you’ll typically find several essential components that form the complete streaming ecosystem. The main unit itself is the centerpiece, usually a compact rectangular device designed to sit discreetly near your television. Most packages include an HDMI cable for connecting to your TV, though the quality and length may vary by manufacturer. You’ll also find a power adapter specific to your region’s electrical standards, along with any necessary regional plug adapters for international compatibility.
Many Android TV boxes come with a remote control, which has evolved significantly in recent years. While basic models include simple infrared remotes, premium devices often feature Bluetooth voice remotes with dedicated buttons for popular streaming services. Some manufacturers may also include additional accessories like batteries for the remote, user manuals, and warranty information. Higher-end models sometimes bundle gaming controllers or include promotional offers for streaming services, though these vary by brand and retailer.
Understanding Device Specifications and Capabilities
Android TV box specifications determine your streaming experience quality and capabilities. The processor, typically measured in cores (quad-core, octa-core), handles the device’s computing power and affects how smoothly apps run. RAM, usually ranging from 2GB to 8GB, influences multitasking ability and how many applications you can run simultaneously without slowdown. Storage capacity, commonly between 8GB and 128GB, determines how many apps and games you can install, though many devices support expandable storage via USB or microSD cards.
Video output capabilities are crucial for picture quality. Most modern Android TV boxes support 4K Ultra HD resolution at 60 frames per second, with some premium models offering 8K support. Look for HDR (High Dynamic Range) compatibility, which enhances color and contrast, with formats like HDR10, HDR10+, and Dolby Vision providing different levels of visual enhancement. Audio capabilities matter too—Dolby Atmos and DTS:X support can transform your home theater experience with immersive, three-dimensional sound.
Connectivity options significantly impact functionality. Dual-band Wi-Fi (2.4GHz and 5GHz) ensures stable wireless streaming, while Ethernet ports provide wired internet options for more reliable connections. Bluetooth compatibility enables wireless connections to headphones, speakers, and game controllers. USB ports allow for connecting external storage, keyboards, webcams, and other peripherals, expanding your device’s versatility beyond basic streaming.
Essential Pre-Setup Checklist
Before beginning your Android TV box setup, ensure you have all necessary components and proper environment preparation. Verify your television has an available HDMI port—preferably HDMI 2.0 or higher for 4K content. Check that your internet connection meets streaming requirements; for 4K streaming, you’ll need at least 25 Mbps download speed, while HD content requires 5-10 Mbps. Test your network speed using online tools to confirm adequate performance.
Prepare your streaming accounts in advance, including your primary services like Netflix, Amazon Prime Video, Disney+, and any IPTV subscriptions you plan to use. Many users benefit from exploring IPTV free trials before committing to long-term subscriptions. Ensure you have login credentials readily available for seamless setup. Additionally, consider your preferred payment method for any subscription services you might activate during the setup process.
Gather necessary accessories that might enhance your experience. A USB keyboard can simplify text entry during setup, while a compatible game controller expands gaming possibilities. If using wired internet, have an Ethernet cable available, and consider cable length based on your router’s location. For storage expansion, prepare compatible USB drives or microSD cards if you plan to install numerous applications or store media locally.
Finally, ensure adequate ventilation around your intended setup location. Android TV boxes generate heat during operation, so avoid enclosing them in tight spaces or stacking other devices directly on top. Clear the area of dust and ensure proper air circulation to prevent overheating, which can affect performance and device longevity. With these preparations complete, you’re ready to begin the setup process with confidence.
How to Connect Your Android TV to Your Television
Connecting your Android TV device is a straightforward process that transforms your television into a smart entertainment hub. First, locate the HDMI port on your television, which is typically found on the back or side panel. Most modern Android TV devices, including popular models from Google and NVIDIA, require an HDMI connection for optimal video and audio quality.
Insert one end of the HDMI cable into your Android TV device and the other end into an available HDMI port on your television. Make sure the connection is secure to prevent signal issues. If your television has multiple HDMI ports, note which one you’re using, as you’ll need to select the corresponding input source later.
Powering Up Your Android TV Device
After establishing the HDMI connection, connect the power adapter to your Android TV device and plug it into a power outlet. Many Android TV streaming devices come with a USB power cable that can be connected to your television’s USB port, but for optimal performance, using the included power adapter is recommended.
Once powered, your television should detect the new device automatically. Switch your television to the correct HDMI input using your TV remote control. You should see the Android TV setup screen appear, indicating that the physical connection is successful.
Establishing Network Connectivity
Network connectivity is essential for accessing streaming services and content on your Android TV. During the initial setup process, you’ll be prompted to connect to a Wi-Fi network. Select your network from the available list and enter your password using the on-screen keyboard. For more stable connections, especially for IPTV services, consider using an Ethernet adapter if your Android TV device supports wired connections.
Alternatively, some Android TV devices offer Ethernet ports for direct wired internet connections. This option typically provides faster and more reliable internet speeds, which is particularly beneficial for streaming high-quality video content without buffering interruptions.
Completing the Initial Setup
After connecting to your network, follow the on-screen instructions to complete the setup process. This typically includes signing in to your Google account, which allows you to access the Google Play Store for downloading apps and synchronizing your preferences across devices.
You may also be prompted to update the system software during this process. It’s recommended to install any available updates to ensure you have the latest features and security patches. Once completed, your Android TV is ready to use, and you can begin exploring the wide range of streaming options available, including various entertainment apps and services.
For those interested in exploring streaming options, you might consider checking out available IPTV free trials to test different services before committing to a subscription. Many providers offer trial periods that allow you to evaluate their channel selection and streaming quality on your newly connected Android TV device.
First Boot and Initial Setup
When you power on your new streaming device for the first time, you’ll be greeted by a welcome screen that guides you through the essential setup steps. First, select your preferred language from the available options. Next, connect to your Wi-Fi network by choosing it from the list and entering your password. Alternatively, you can use an Ethernet cable for a more stable wired connection if your device supports it.
Meanwhile, the system will automatically check for any available updates. It’s crucial to install these immediately, as they often contain important security patches and performance improvements. After the updates complete, your device will restart to apply the changes.
Google Account Configuration
Signing into your Google Account unlocks the full potential of your Android-based streaming device. This step allows you to access the Google Play Store for downloading apps and synchronizes your preferences across devices. If you don’t have an existing account, you can create one directly through the setup process.
During this phase, you’ll also encounter privacy settings that control data collection and personalized recommendations. Review these options carefully to align with your comfort level. Additionally, you can enable features like Google Assistant for voice control, which proves particularly useful when searching for content or controlling smart home devices.
Essential System Updates
Even after the initial update check, it’s wise to manually verify that your system runs the latest software version. Navigate to Settings > Device Preferences > About > System Update to perform this check. Regular updates not only enhance security but often introduce new features and improve streaming performance.
Furthermore, consider enabling automatic updates in your settings to ensure you always have the most current version. This proactive approach helps prevent compatibility issues with streaming apps and services. For optimal performance, restart your device after major updates to clear temporary files and ensure smooth operation.
Network Optimization
A stable internet connection forms the foundation of quality streaming. After initial setup, test your network speed using built-in diagnostics or third-party apps available through the Google Play Store. If experiencing buffering, try these troubleshooting steps:
- Position your router closer to the streaming device
- Reduce interference by selecting less congested Wi-Fi channels
- Consider using a 5GHz network for reduced interference
- For 4K streaming, ensure your connection meets the minimum 25 Mbps requirement
For the best streaming experience, a wired Ethernet connection typically provides the most consistent performance. However, if using Wi-Fi, placing your router in a central location away from obstructions can significantly improve signal strength.
Once your device setup completes, you might explore IPTV subscription options to access live television content. Many providers offer free trials that let you test their service before committing to a subscription. These trials provide excellent opportunities to evaluate channel selection, streaming quality, and interface usability directly on your newly configured device.
Essential Streaming Apps for Your Android TV
Building your Android TV’s app library starts with the essentials. First, install the Google Play Store itself, which is your primary gateway to thousands of applications. For mainstream content, you can’t go wrong with Netflix, Disney+, and Amazon Prime Video. Meanwhile, YouTube offers an endless stream of free videos and creator content.
For live TV and sports, consider dedicated apps like Sling TV, Hulu + Live TV, or YouTube TV. These services replicate the traditional cable experience over the internet. If you’re exploring more specialized live TV options, our complete IPTV subscription guide provides a deep dive into alternative services.
How to Navigate the Google Play Store
Accessing the Play Store is straightforward. From your home screen, navigate to the “Apps” tab and select the Play Store icon. Once open, you can browse featured apps or use the search function in the top-right corner to find something specific.
The store is organized into categories like “Movies & TV,” “Games,” and “Apps,” making discovery simple. Before installing, always check the app’s rating, number of downloads, and user reviews to ensure quality and compatibility with your device [Source: Google Play Help].
Mastering Your Home Screen Layout
Android TV allows for significant home screen customization to prioritize your most-used content. To rearrange channels, highlight an app or row, press the “Select” button on your remote, and choose “Move channel.” You can drag items to your preferred position for quicker access.
Furthermore, you can remove unwanted channels to declutter your view. Simply highlight the channel, press the “Select” button, and choose “Remove channel.” This creates a cleaner, more personalized interface that reflects your viewing habits.
For a truly tailored experience, explore third-party launchers available in the Play Store. These can completely transform your home screen’s look and functionality, offering different layouts and organizational features not available in the stock interface.
Optimizing Your Setup for the Best Experience
After customizing your layout, take a moment to optimize a few key settings. Head to “Settings” > “Device Preferences” > “Screen Saver” to choose when and how your screen saver activates. Additionally, managing your notifications under “Settings” > “Apps” can prevent unnecessary interruptions during your viewing sessions.
Finally, keeping your apps updated is crucial for performance and security. The Google Play Store can be set to update apps automatically, ensuring you always have the latest features and bug fixes without manual intervention [Source: Google Play Help].
Understanding Resolution Settings
Proper resolution configuration is fundamental to achieving the best picture quality from your streaming device. Most modern devices support up to 4K Ultra HD, which offers four times the pixels of 1080p Full HD for incredible detail. However, the optimal setting depends on your TV’s native resolution and internet speed. Forcing a 4K stream on a 1080p display won’t improve quality and may cause playback issues.
To check your settings, navigate to the “Display & Sound” or similar menu on your device. Select the highest resolution that matches your TV’s capability. If you experience buffering, try a lower resolution like 1080p. Enabling features like “Match Content” or “Match Frame Rate” can further enhance picture quality by allowing the device to automatically switch to the source’s native resolution and frame rate, reducing motion judder.
Configuring Your Audio for Immersive Sound
Great video deserves great audio. Modern streaming services support advanced audio formats like Dolby Atmos and DTS:X, which create a three-dimensional soundscape. To access these, ensure your audio settings are correctly configured. Go to your device’s audio settings and select the highest quality format your soundbar or home theater system supports, such as “Dolby Digital Plus” or “Bitstream.”
If you’re using a soundbar, placing it directly below your TV and ensuring it’s not obstructed can dramatically improve clarity. For those using TV speakers, enabling any virtual surround sound or dialogue enhancement features can make a significant difference. A simple audio calibration using your device’s built-in tools can also help balance levels for clearer speech and more impactful effects.
Screen Calibration Techniques for Perfect Picture
Out-of-the-box TV settings are often designed to look bright and vivid in stores, not in your living room. Calibrating your screen is crucial for accurate colors and contrast. You can start with your TV’s preset picture modes. “Movie” or “Cinema” modes are typically the most color-accurate for watching content.
For a more precise calibration, use free test patterns available on YouTube or through streaming apps. Adjust basic settings like brightness (to reveal shadow detail), contrast (for white levels), and color (for saturation). Additionally, reducing the “Sharpness” setting to near zero often provides a more natural, film-like image without artificial edge enhancement.
Optimizing Network Performance
Your network connection directly impacts streaming quality. For stable 4K streaming, a minimum of 25 Mbps is recommended. Use a wired Ethernet connection for your streaming device whenever possible, as it provides a more stable and faster connection than Wi-Fi. If you must use Wi-Fi, ensure your router is placed close to your streaming device and consider using the less congested 5 GHz band.
Regularly clearing the cache on your streaming apps can also improve performance by freeing up memory. Furthermore, closing unused background applications on your device ensures maximum resources are dedicated to your streaming experience. For more tips on getting the most from your service, explore our complete IPTV subscription guide.