HDMI No Signal Fix Complete Streaming Device Setup Guide
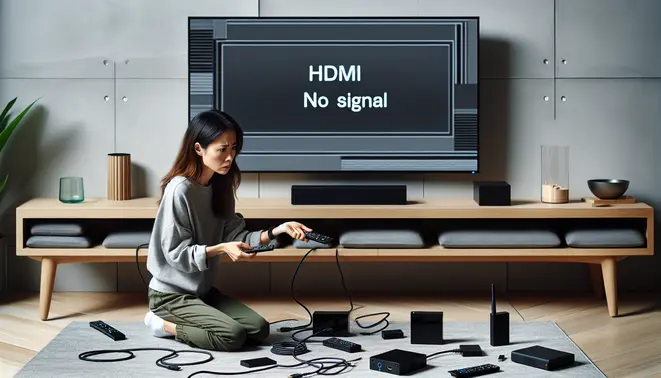
Table of Contents
- Understanding “HDMI No Signal”
- Common Causes of the HDMI No Signal Error
- Why Streaming Devices Are Particularly Prone
- Step-by-Step Guide to Troubleshooting Your Streaming Device Connection
- Universal HDMI No Signal Fixes
- Device-Specific HDMI No Signal Fixes
- Advanced Settings for Optimal Performance
- Maintenance and Prevention Strategies
- Setting Up Your Streaming Device for Peak Performance
- Sources
Understanding “HDMI No Signal”
The “HDMI No Signal” error is a communication failure between your source device, like a streaming stick, and your television. Essentially, your TV is powered on and ready to receive a video feed, but it is not detecting any active data coming through the HDMI cable from the connected device. This results in a blank screen accompanied by the frustrating on-screen message.
Common Causes of the HDMI No Signal Error
This error can stem from a variety of simple hardware and software issues. Pinpointing the exact cause is the first step toward a solution.
- Loose or Faulty Connections: The most frequent culprit is a physical connection problem. An HDMI cable that isn’t fully seated in the port on either the TV or the streaming device can easily cause a signal loss.
- Incorrect Input Source: Your TV may be set to the wrong HDMI input. For example, if your device is plugged into “HDMI 2,” but your TV is set to display “HDMI 1,” you will see the no signal error.
- HDCP Handshake Failures: HDCP (High-bandwidth Digital Content Protection) is an anti-piracy protocol. A failed “handshake” between the device and TV during this authentication process can block the signal.
- Power Issues: If your streaming device isn’t receiving adequate power, it may not boot up completely, preventing it from sending a signal. This is common with devices that use USB power adapters.
- Outdated Firmware: Bugs or incompatibilities in the TV’s or streaming device’s software can lead to persistent connection problems.
Why Streaming Devices Are Particularly Prone
While any HDMI device can experience this error, streaming media players like Roku, Amazon Fire TV, and Google Chromecast seem to encounter it more often. This heightened susceptibility is due to several key factors.
Frequent Power Cycling
Unlike game consoles or Blu-ray players that might remain plugged in, streaming devices are often unplugged or put into low-power sleep modes. Each time they power up, they must re-establish the HDMI connection and HDCP handshake with the TV, creating more opportunities for the handshake to fail.
Demands of High-Resolution Content
Modern streaming services deliver content in 4K, HDR, and Dolby Vision. These high-bandwidth signals are more demanding on both the HDMI cable and the device’s hardware. An older or lower-quality cable that worked for 1080p content might fail under the strain of a 4K HDR stream, resulting in a signal drop.
Software and App Instability
Streaming devices run complex operating systems and apps that receive frequent updates. A buggy app or a problematic system update can sometimes interfere with the video output process, causing the device to stop sending a signal to the TV. Furthermore, if you are using a service like IPTV, compatibility issues between the app and your device’s firmware can also trigger this error.
HDCP Compliance Challenges
Content providers are increasingly strict about copyright protection. Streaming devices must constantly negotiate HDCP with the TV. If the TV is older or the device’s HDCP implementation has a minor glitch, the handshake can fail, and the protected content will not display, showing a “No Signal” screen instead. This is a common point of failure, especially when trying to access premium content from services you might be testing through an IPTV free trial.
Step-by-Step Guide to Troubleshooting Your Streaming Device Connection
When your streaming device fails to display content on your TV, the issue often lies in the physical connections or settings. This comprehensive guide walks you through the essential troubleshooting steps to resolve common connectivity problems.
1. Verify Cable Connections
Begin by checking all physical connections between your streaming device and television. Ensure HDMI cables are securely plugged into both devices, as loose connections frequently cause display issues. For optimal performance, use high-speed HDMI cables that support the latest standards. Additionally, inspect cables for any visible damage or wear that could affect signal transmission.
2. Select the Correct HDMI Port
Modern televisions typically feature multiple HDMI ports, and selecting the wrong one is a common oversight. Use your TV remote to cycle through available HDMI inputs until you locate the correct port connected to your streaming device. Many TVs label these ports numerically (HDMI 1, HDMI 2, etc.), so note which port you’re using during setup. Some manufacturers also provide on-screen input labels that appear when switching between sources.
3. Check Power Supply Requirements
Streaming devices have specific power requirements that must be met for proper operation. Verify that you’re using the original power adapter provided with your device, as third-party alternatives may not deliver sufficient power. Ensure the power cable is firmly connected to both the device and wall outlet. If using a USB port on your TV for power, try switching to a wall outlet instead, as TV USB ports sometimes provide inadequate power for streaming devices.
4. Confirm Input Source Selection
Your television must be set to the correct input source corresponding to your streaming device’s connection. Using your TV remote, access the input or source menu and select the appropriate HDMI input. Many modern TVs include an input label feature that displays connected devices, making identification easier. If uncertain, try each HDMI input sequentially until your streaming device’s interface appears. Some TVs also offer quick access buttons specifically for switching between HDMI sources.
5. Additional Troubleshooting Steps
If basic checks don’t resolve the issue, consider these advanced troubleshooting methods. First, try a different HDMI cable to rule out cable failure. Second, test your streaming device on another TV to determine whether the problem lies with the device or your television. Finally, perform a power cycle by unplugging both devices for 30 seconds before reconnecting them. This simple reset often resolves temporary glitches affecting device recognition.
For more comprehensive guidance on streaming devices and services, explore our complete streaming resource library. Additionally, if you’re considering IPTV services, our IPTV subscription guide provides detailed comparisons and recommendations to enhance your viewing experience.
Universal HDMI No Signal Fixes
Universal Power Cycle Methods
A power cycle is one of the most effective first steps for troubleshooting any streaming device. This process clears temporary caches and resets the device’s software. For most devices, this involves unplugging the power cable from the wall outlet or the device itself. Wait for at least 60 seconds before plugging it back in. This waiting period is crucial as it ensures any residual power fully drains from the internal components.
Some devices, like the Amazon Fire TV Stick, may require you to hold down a specific button combination while plugging it in to initiate a deeper reset. Always refer to your device’s manual for model-specific instructions. Performing a power cycle can resolve a wide range of issues, from app crashes and buffering to connectivity problems.
Cable Reseating and Connection Checks
Loose or faulty cables are a common culprit behind a “No Signal” message. Begin by inspecting the HDMI cable connecting your streaming device to your TV. Gently unplug the cable from both the device and the TV port, then firmly reseat it. Ensure the connection is secure. If possible, try using a different HDMI cable to rule out a hardware failure.
Additionally, verify that you have selected the correct input source on your TV. Many modern TVs have multiple HDMI ports (e.g., HDMI 1, HDMI 2). Use your TV remote to cycle through the available inputs until you see your device’s interface. For devices that require external power, such as streaming sticks, double-check that the USB power cable is properly connected to both the device and a working power adapter or USB port on your TV.
HDMI Port Testing and Troubleshooting
If reseating the cable doesn’t work, the issue might lie with the HDMI port itself. Test the suspect port by connecting a different, known-working device, like a gaming console or Blu-ray player. If the other device works, the problem is likely with your streaming device. Conversely, if the second device also fails to display a signal, the TV’s HDMI port may be faulty.
In such cases, try a different HDMI port on your TV. It’s also worth checking your TV’s settings for features like HDMI-CEC (Consumer Electronics Control), which can sometimes cause conflicts. Temporarily disabling HDMI-CEC can help determine if it’s the source of the problem. For more persistent issues, a factory reset of your TV might be necessary, but be sure to back up your settings first.
Simple Restart Procedures for Streaming Devices
Beyond a full power cycle, most streaming devices have built-in software restart options. This is often a gentler first step than unplugging the device. Navigate to the device’s settings menu, typically found under “System,” “Device,” or “Preferences.” Look for an option labeled “Restart,” “Reboot,” or “System Restart.” Selecting this will cleanly shut down and restart the device’s operating system.
If your device is unresponsive and you cannot access the menu, a forced restart is your next best option. For many devices, this can be done by holding down the physical power or reset button for 10-15 seconds. As a last resort, if you continue to experience problems, you may need to perform a factory reset. Be aware that this will erase all your personal data, apps, and settings, returning the device to its original state. For a deeper dive into getting the most from your service, explore our complete guide to IPTV subscriptions.
Device-Specific HDMI No Signal Fixes
Roku Troubleshooting
When your Roku device shows a “no signal” error, start with basic power cycling. First, unplug both your Roku and television from power for 60 seconds. Meanwhile, check that your HDMI cable is firmly connected to both devices. For Roku-specific issues, navigate to Settings > Display type and ensure the resolution matches your TV’s capabilities. Some 4K televisions require specific HDMI ports for optimal performance, so try different inputs if available. Additionally, perform a system update through Settings > System > System update to resolve compatibility issues. If problems persist, factory reset your device by pressing the reset button for 10 seconds, though this will erase all preferences [Source: Roku Support].
Fire TV Stick Solutions
Amazon’s Fire TV Stick often experiences HDMI handshake problems, particularly after software updates. Begin troubleshooting by using the original power adapter rather than TV USB ports, as insufficient power frequently causes signal drops. Check your display settings under Settings > Display & Sounds > Display and select “Auto” for resolution detection. For older televisions, enable “Display Compatibility” mode to force standard HD output. If you’re using an HDMI extender, remove it temporarily to test direct connection. Amazon recommends clearing cache through Settings > Applications > Manage Installed Applications > Fire TV > Clear Cache to resolve performance-related signal issues [Source: Amazon Fire TV Support].
Apple TV Resolution Methods
Apple TV’s HDMI connectivity problems often stem from HDCP compliance or resolution mismatches. Start by holding the Menu and Volume Down buttons simultaneously for 5 seconds to reset video output. Access Settings > Video and Audio > Format to verify compatibility with your display. For 4K HDR content, ensure you’re using HDMI 2.0 cables and compatible ports. Apple suggests checking for software updates through Settings > System > Software Updates, as recent versions often include HDMI compatibility improvements. If using an AV receiver, connect Apple TV directly to the television to isolate the issue. The device’s Match Content feature under Settings > Video and Audio can also resolve format conflicts with certain content [Source: Apple Support].
Chromecast Quick Fixes
Google Chromecast devices frequently encounter HDMI signal problems due to power supply limitations or overheating. Always use the provided power adapter rather than TV USB ports, as inconsistent power causes frequent disconnections. Restart your device through the Google Home app or by disconnecting power for 2 minutes. Check HDMI-CEC settings on your television, as enabled Simplink (LG), Anynet+ (Samsung), or BRAVIA Sync (Sony) can interfere with signal detection. For Chromecast with Google TV, navigate to Settings > Display & Sound > Resolution and select “Match content” for better compatibility. Factory reset remains the last resort, accomplished by holding the button on the device for 25 seconds until the LED flashes [Source: Google Chromecast Help].
Universal HDMI Best Practices
Regardless of your streaming device, several universal strategies can resolve persistent HDMI issues. First, systematically test different HDMI cables, as damaged or low-quality cables remain the most common culprit. Try each HDMI port on your television, as manufacturers often designate specific ports for enhanced features. Update your television’s firmware through its settings menu, since outdated software frequently causes compatibility problems. For entertainment setups involving multiple devices, consider our complete IPTV subscription guide to optimize your streaming experience. Additionally, power management plays a crucial role – use high-quality surge protectors and avoid daisy-chaining power strips to ensure stable electricity supply to all components.
Advanced Settings for Optimal Performance
Resolution Optimization for Maximum Picture Quality
Getting the best possible picture quality from your streaming device requires careful resolution configuration. Most modern devices default to Auto settings, but manual configuration often delivers superior results. Navigate to your device’s Display or Video settings menu to select the highest resolution your television supports—typically 4K (3840×2160) for newer models.
For optimal performance, ensure your HDMI cable supports the required bandwidth. Premium High-Speed HDMI cables certified for 18Gbps bandwidth are essential for 4K HDR content at 60Hz. Additionally, enable HDR (High Dynamic Range) formats like HDR10, Dolby Vision, or HLG when available, as they significantly enhance color depth and contrast compared to standard dynamic range content.
Color Space and Refresh Rate Considerations
Advanced users should explore color space settings, with BT.2020 offering the widest color gamut for compatible content. Match your device’s refresh rate to your content—24Hz for films, 60Hz for live TV and sports. Some streaming platforms like Netflix and Amazon Prime Video automatically adjust these settings when supported.
HDMI-CEC Setup and Configuration
HDMI-CEC (Consumer Electronics Control) allows connected devices to control each other through a single remote. To enable this feature, access your streaming device’s settings menu—typically under System, Display, or Remote settings—and toggle the HDMI-CEC option. Common implementation names include Anynet+ (Samsung), Bravia Sync (Sony), or SimpLink (LG).
For proper HDMI-CEC functionality, ensure all connected devices support the standard and are connected to HDMI-CEC enabled ports on your television. Power cycle all devices after enabling the feature to establish proper communication. This allows your TV remote to control basic functions of your streaming device, eliminating the need for multiple remotes.
Troubleshooting HDCP Compatibility Issues
HDCP (High-bandwidth Digital Content Protection) errors frequently disrupt streaming experiences, typically appearing as black screens or error messages stating “content not available.” These issues often stem from incompatible HDMI cables, outdated firmware, or connection sequence problems.
Begin troubleshooting by ensuring all HDMI cables are HDCP 2.2 compliant, essential for 4K content protection. Update firmware on both your streaming device and television to the latest versions, as manufacturers regularly release HDCP compatibility patches.