Expand Firestick Storage Complete Streaming Device Setup Guide
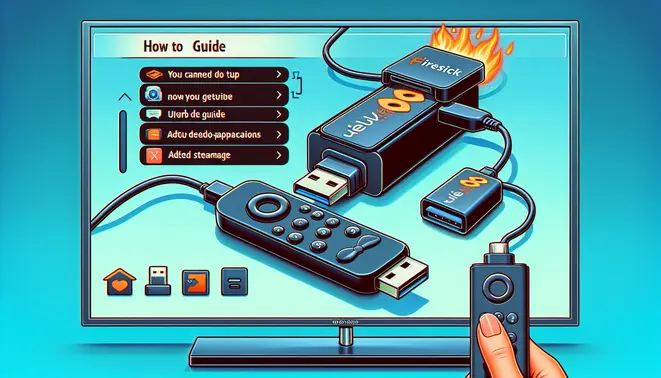
Table of Contents
- Why 8GB Isn’t Enough for Modern Streaming
- Common Warning Signs of Storage Issues
- When to Consider Storage Expansion
- Essential Hardware for Firestick Storage Expansion
- Getting Your USB Drive Ready for Firestick
- Unlocking Developer Options & Configuring Storage
- Advanced Storage Management Techniques
- Alternative Storage Expansion Methods
- Essential Maintenance Practices
Why 8GB Isn’t Enough for Modern Streaming
The default 8GB storage capacity on Amazon Firestick devices has become increasingly inadequate for today’s streaming demands. While this storage might seem sufficient at first glance, the operating system and pre-installed applications consume approximately 4GB, leaving users with only about 4GB of usable space for their streaming apps and content [Source: Amazon Developer Options]. This limited capacity creates significant challenges for cord-cutters who rely on multiple streaming services and applications.
Modern streaming platforms like Netflix, Disney+, and Hulu require substantial storage for their applications and cached data. Additionally, when you explore alternative streaming options like IPTV services, the storage requirements can be even more demanding. Many users discover they need to manage storage carefully just to maintain their essential streaming applications, let alone accommodate updates and temporary files that accumulate over time.
Common Warning Signs of Storage Issues
Several clear indicators suggest your Firestick storage is reaching its limits. Frequent app crashes or unexpected closures often signal insufficient storage for proper application operation. Similarly, if your device takes unusually long to load applications or becomes sluggish during navigation, storage constraints may be the culprit. The most direct warning comes from Amazon’s system itself—when you receive “Storage Almost Full” notifications, it’s time to address the issue promptly.
Another common symptom involves installation failures for new applications. When you attempt to download additional streaming apps or updates, error messages about insufficient storage indicate your device has reached its capacity. Performance degradation across multiple applications, not just a single app, typically points to broader storage limitations affecting your device’s overall functionality.
When to Consider Storage Expansion
Determining the right time to expand your Firestick storage depends on your streaming habits and needs. If you regularly use more than 5-6 streaming applications simultaneously, or if you’ve explored options through IPTV free trials and found services you want to keep, storage expansion becomes necessary. The tipping point often arrives when you can no longer update existing applications without first deleting others—a clear sign that your current storage can’t support your streaming lifestyle.
Users who frequently test new streaming services should particularly consider expansion. As you evaluate different platforms through IPTV trial periods, the accumulated application data and cached content quickly consume available space. Furthermore, if you notice your device performance declining despite regular cache clearing, or if you’re constantly managing storage by deleting and reinstalling applications, these are strong indicators that expanding your storage will significantly improve your streaming experience.
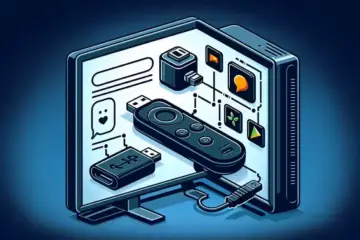
Essential Hardware for Firestick Storage Expansion
To successfully expand your Firestick storage, you need two key hardware components: a USB On-The-Go (OTG) adapter and a compatible USB drive. The OTG adapter serves as a bridge, allowing your Firestick to connect with external USB storage devices. Meanwhile, the USB drive provides the actual additional storage space for your apps, games, and media files. This setup effectively bypasses the Firestick’s limited internal storage, giving you the flexibility to download more content without constant management.
Choosing the Right USB OTG Adapter
A USB OTG adapter is crucial because Firesticks lack a full-sized USB port. These compact adapters typically feature a micro-USB or USB-C connector (depending on your Firestick model) that plugs into the power port, with additional ports for both power input and USB device connection. When selecting an OTG adapter, ensure it specifically mentions compatibility with Amazon Fire TV devices. Fortunately, these adapters are widely available and budget-friendly, with most quality options costing between $8-15. Popular reliable choices include the UGREEN Micro USB OTG Cable and Cable Matters USB-C OTG Adapter for newer Fire TV models.
Selecting Compatible USB Drives
For optimal performance with your Firestick, focus on USB drives with these specifications:
- Storage Capacity: 32GB to 128GB (Fire OS has limitations with drives larger than 128GB)
- Format: FAT32 or exFAT (NTFS requires additional workarounds)
- Type: USB 2.0 or USB 3.0 flash drives (USB 3.0 offers faster transfer speeds)
- Physical Size: Compact, low-profile designs work best to avoid blocking other ports
Most modern USB flash drives will work, but some users report better compatibility with brands like SanDisk, Samsung, and PNY. The SanDisk Ultra Fit is particularly popular due to its minimal profile that doesn’t obstruct adjacent ports.
Budget-Friendly Hardware Options
Expanding your Firestick storage doesn’t require significant investment. You can find reliable OTG adapters from brands like UGREEN, Anker, and Amazon Basics for under $10. For storage, a 64GB USB 3.0 flash drive typically costs between $12-20, providing substantial additional space without breaking the bank. Many users successfully use older USB drives they already own, making this upgrade potentially even more economical. Before purchasing new hardware, check if you have compatible devices available, as this approach can reduce costs to just the OTG adapter if needed.
Getting Your USB Drive Ready for Firestick
Before connecting any storage device to your Firestick, proper preparation ensures compatibility and optimal performance. The process begins with selecting the right USB drive and formatting it correctly for the Android-based Fire OS.
For most users, a USB 2.0 or 3.0 flash drive with at least 16GB capacity works perfectly. However, if you plan to store large media libraries or install multiple applications externally, consider upgrading to 64GB or 128GB. The Firestick supports drives up to 2TB, though larger capacities may require additional power through a powered USB hub.
Formatting Your USB Drive Correctly
Amazon Fire TV devices require specific file system formats to recognize external storage. The most compatible format is FAT32, which works seamlessly across all Firestick generations. For larger drives (over 32GB), exFAT provides better compatibility with modern file sizes while maintaining Firestick support.
To format your drive on Windows, right-click the drive in File Explorer, select “Format,” and choose either FAT32 or exFAT. On Mac, use Disk Utility to erase the drive and select the appropriate format. Remember that formatting will erase all existing data, so back up any important files beforehand.
Connecting Your USB Drive to Firestick
The Firestick lacks a direct USB port, requiring an OTG (On-The-Go) adapter to bridge the connection. These inexpensive adapters convert the Firestick’s micro-USB power port into a functional USB-A port while maintaining power delivery.
Start by connecting the OTG adapter to your Firestick’s micro-USB port. Then plug your formatted USB drive into the adapter’s USB port. Finally, connect the Firestick’s power cable to the OTG adapter’s power input port. This configuration allows simultaneous data transfer and device power.
After connecting, your Firestick should automatically detect the new storage. Navigate to Settings > My Fire TV > About > Storage to confirm recognition. The system will typically prompt you to format the drive for device use if it hasn’t been properly prepared.
Troubleshooting Common Connection Issues
If your Firestick doesn’t recognize the USB drive, several solutions can resolve the problem. First, ensure your OTG adapter is properly seated and compatible with your Firestick model. Some older adapters may not work with newer Fire TV devices.
Power issues frequently cause recognition problems. Try using the original Amazon power adapter rather than TV USB ports, which often provide insufficient power. If using larger drives, consider a powered USB hub to ensure adequate power delivery.
File system compatibility represents another common hurdle. If your drive isn’t recognized, reformat it using the correct file system. The Streaming Devices Guide recommends FAT32 for universal compatibility across all Firestick models.
For persistent issues, restart your Firestick by unplugging it for 30 seconds before reconnecting. This simple reset often resolves temporary glitches preventing storage detection. If problems continue, test your USB drive on another device to rule out hardware failure.
Unlocking Developer Options & Configuring Storage
To begin, you need to access the hidden Developer Options menu on your Fire TV device. First, navigate to the home screen and select Settings from the top menu. From there, scroll to and select My Fire TV (this may be called Device or System on older models).
Next, click on About. Now, you will need to highlight the Serial Number option. Here is the key step: press the Select button on your remote seven times in quick succession. You should see a countdown message appear, and a confirmation that “You are now a developer” will pop up.
Enabling ADB Debugging
Once Developer Options are unlocked, go back one step to the main My Fire TV menu. You will now see a new option called Developer Options. Select it. Inside this menu, locate the setting for ADB Debugging and toggle it ON.
This setting allows your Firestick to communicate with other devices and software on your network for advanced tasks. Additionally, you should enable Apps from Unknown Sources if you plan to install applications outside of the Amazon Appstore [Source: Amazon Developer Options].
Setting External Storage as the Default Location
With your formatted USB drive connected, return to the Developer Options menu. Scroll down until you find the setting named Force allow apps on external and toggle it ON. This setting bypasses app restrictions and permits installation to external media.
Immediately below that, locate the option USB debugging and ensure it is also enabled for full functionality. Finally, find the setting Select debug app (this is not required for storage but is part of the full developer setup). Your Firestick will now prioritize the external USB drive for new app installations and their associated data, preventing your internal storage from filling up quickly [Source: AFTVnews].
Advanced Storage Management Techniques
Once you’ve expanded your Firestick storage, implementing advanced management techniques ensures optimal performance and prevents future space issues. These methods go beyond basic file deletion, offering automated and proactive approaches to storage maintenance.
Using Helper Apps for Automated Cleanup
Helper applications provide automated solutions for managing your Firestick’s expanded storage. These tools systematically clear temporary files, app caches, and residual data that accumulate during normal usage.
Background App Cleaner automatically removes cache files from inactive applications, while Clean Master for Fire TV offers scheduled cleaning sessions. These applications work in the background, requiring minimal user intervention once configured. They target specific file types that commonly consume storage space without affecting your personal data or app settings.
Monitoring Storage Usage in Real-Time
Real-time storage monitoring provides immediate visibility into how your expanded storage is being utilized. This proactive approach helps identify space-hogging applications and files before they cause performance issues.
The native Fire OS storage manager offers basic monitoring capabilities, showing overall storage allocation by application type. For more detailed insights, third-party applications like Storage Analyzer & Disk Usage provide granular breakdowns of file types and sizes. These tools help identify exactly which files are consuming the most space, enabling targeted cleanup efforts rather than indiscriminate deletion.
Optimizing App Installation and Data Storage
Strategic app installation and data management significantly impact long-term storage health. Prioritize installing essential applications directly to internal storage while using expanded storage for media files and less critical apps.
Regularly audit installed applications and remove those no longer in use. Many streaming apps accumulate significant data over time, even when not actively used. Furthermore, configure streaming applications to limit cache sizes and download quality settings where appropriate. This balanced approach ensures your expanded storage serves as a sustainable solution rather than a temporary fix.
Alternative Storage Expansion Methods
Network Attached Storage (NAS)
Network Attached Storage (NAS) provides a powerful alternative to USB drives for expanding your Firestick storage. This approach connects a dedicated storage device directly to your home network, allowing multiple devices—including your Firestick—to access files simultaneously. Many modern NAS devices support media server protocols like Plex or Kodi, enabling seamless streaming of your content library.
Setting up a NAS for your Firestick typically involves installing a media server app like Plex or using the built-in network browsing capabilities in apps like VLC. The primary advantage is centralized storage; you can manage all your media in one location accessible by every compatible device in your home. This eliminates the need to physically connect storage to your Firestick and offers significantly more capacity than typical USB options.
Cloud Storage Services
Cloud services offer a wireless solution for expanding your Firestick’s accessible storage. Platforms like Google Drive, Dropbox, and OneDrive can be accessed through various file manager apps available on the Amazon Appstore. While you can’t install apps directly to cloud storage, you can store media files and documents there for on-demand access.
To use cloud storage effectively, install a file manager app like ES File Explorer or X-plore from the Amazon Appstore. These applications allow you to log into your cloud accounts and stream videos or music directly to your Firestick. However, this method’s performance heavily depends on your internet connection speed and stability, making it less ideal for high-bitrate 4K content without a robust network.
MicroSD Card Expansion
For Fire TV Stick models that support microSD expansion—primarily the Fire TV Stick (3rd Gen) and later—this internal solution provides the most integrated experience. You can format a microSD card as internal storage, allowing the system to treat it as native space for apps and games. Alternatively, formatting it as portable storage lets you manually transfer media files.
According to Amazon’s official documentation, compatible Fire TV devices support microSD cards up to 128GB. This method doesn’t require additional cables or network configuration, making it a straightforward plug-and-play solution. Simply insert the formatted card into the dedicated slot on your Fire TV device to instantly expand your available storage.
Essential Maintenance Practices for Expanded Firestick Storage
Once you’ve expanded your Firestick storage, implementing regular maintenance routines becomes crucial for sustained performance. A well-organized approach prevents slowdowns and ensures your device continues to operate smoothly with the additional capacity.
Establish Regular Cleanup Routines
Schedule weekly cleanup sessions to remove unnecessary files and cached data. The Firestick’s storage management tools allow you to quickly identify and delete temporary files, app caches, and unused applications. Furthermore, clearing the cache for streaming apps like Netflix and Hulu can free up significant space while potentially resolving playback issues.